All posts by Last Great Road Trip (LGRT)

baja off road adventure satellite map route

Baja Off Road Adventure Track

Yes the Baja Off-Road Adventure is under way!  We’re driving from Seattle, Washington to the tip of Baja, Mexico.  There is a lot of highway down to the boarder but after that we’ll be following the 2007 Baja 1000 race course which will take us back and forth across the peninsula several times until we reach Cabo San Lucas.

Throughout this off-road adventure we’ll be posting on Facebook and Twitter.  You can follow us in real time thanks to satellite tracing. To see where Hula Betty is as she rides on the dash south through the Baja click on off-road adventure live satellite tracking.

Follow up: This Baja Off-Road Adventure was hella hard.  Harder than we ever imagined.   Now you can read the stories and see the pictures of it all.

lgrt decal check mark

Off-Road Check List: Rig Inspection (aka Did I Break Anything)

Whats the difference between wheeling a local 4×4 trail and an epic off-road adventure?  You check your rig the day before you wheel a local trail and fix it when you get back home, on an epic off-road adventure you check your rig every morning and fix it every night.

OK, so Conan has nothing to worry about from my stand-up, but there is a lot of truth in that joke.  Pilots know that you live and die by your check lists: prior to take-off, during flight and prior to landing.  The same is true in wheeling, especially if you will be dependent on your rig for a number of days, with no support in sight.

Sometimes with all the excitement and work of an off-road adventure it is easy to forget something (trust me, I’ve forgotten more than my share).  In order to reduce the chance of missing a potential problem, we now keep a laminated memory jogger checklist to help us stick to our inspection program before, during and after a day on the trail.

Pre-Trip / Daily – Rig Inspection

  1. Axles & Differentials – bolts, boots, clips, u-joints, grease points.  Check to ensure everything is tight and look for leaks or drips.
  2. Battery – clean terminals, check for damaged, corroded wiring. Check for loose connections.
  3. Brakes – drums, rotors, pads/shoes, fluid, hoses, leaks, check parking brake, brake lights.  Helps to have a second person pressing on the breaks while checking.
  4. Belts & Hoses – look for cracks or bulges. Ensure spares are packed in the parts bin.
  5. Body/Frame – look for cracks and rust.  Remove any sticks and debris caught up in the frame.
  6. Cooling/Heating system – look for leaks, fluid levels, clean and repair fins, check hoses and clamps, thermostat, radiator cap. Ensure leak repair kit is packed in parts bin.
  7. Communications – CB / ham radio, antenna broadcast and receive.
  8. Driveline/Transmission – inspect case and shifter, leaks, fluids, universal & CV joints, skid plates
  9. Engine – carburetor, fuel injectors, spark plugs, wires, PVC valve, pumps, distributor & wire, check for leaks and cracks, air filter (clean or replace).  Keep an eye out for loose wires and hoses.
  10. Exhaust – muffler, tailpipes (rust or holes or hanging). Check all hardware holding tailpipes in place.
  11. Fluids – oil, transmission, brake, radiator coolant, gear oils, wipers, power steering (check levels and color).  Ensure extra fluids packed in rig.
  12. Lights – headlights, brake lights, auxiliary lights; make sure they’re aimed properly.  Verify turn signals.  Ensure extra bulbs packed in parts bin.
  13. Steering – check alignment, fluid level, belts and hoses, pump and reservoir.  Look for leaks.  Check tie-rod boots for tears or rips.  Check all joints for play.
  14. Suspension – coil overs, springs, shocks, alignment, wheel bearings, steering linkage, control arms, pan bars.  Notice unusual play in components.
  15. Tires – tighten (torque) lug nuts, air pressure, tread wear (including your full-size spare), look for cuts and missing chunks, torque beadlock bolts.  Ensure auxiliary air pump or CO2 tank is operational and packed in the rig.
  16. Winch – free spool rope and inspect, rewind onto drum.  Check for loose connections and look for frayed rope or wires.
  17. Wipers – check for wear, fluid level.

Trail Head – Rig Inspection

Before you take off for the trail start the engine and inspect the following with while the rig warms up:

  1. Fuel level – check fuel gauge ensuring level is on full (plan for next fuel stop if necessary).
  2. Voltage – check voltage gauge for proper level.
  3. Oil pressure – check oil pressure gauge for proper pressure.
  4. Engine RPMs – check tachometer to ensure smooth maintained engine idle speed.  Listen for misfires and unusual engine noise.  (you should know your rig’s personality including how its engine sounds normally)
  5. Temperature – check temperature gauge to see proper operation and coolant temperature.
  6. Transfer case – ensure transfer case engages in 4 wheel high and 4 wheel low as well as disengages smoothly.
  7. Traction control – test that the rear locker engages correctly. Test A-trac (or front locker) for proper engagement.  Make sure the disengage as well.
  8. Load – ensure load is properly secured.  Check hi-lift jack, shovel and any exterior mounted items.
  9. Walk around – make one last walk around the rig.  Look for any item left out.  Ensure valve stem caps are screwed on after airing down.  Check that nothing was left resting on the spare, bumper, hood or roof.

If you are on a multi-day off-road adventure stop early enough so that you can fully inspect your rig for damage while the sun is still out.  Stopping early also gives you enough daylight to see what you are doing if repairs are needed.  Tip: remember fluid levels change based on the engine temperature always read against the appropriate level marks.

While a checklist wont prevent breakage, it will go a long way to lessening potential problems.  By catching leaks, tears and loose bolts early on, you can hopefully avoid finding yourself trying to reconnect a break line while standing in axle deep mud.  But just in case all hell breaks loose… carry lots of duct tape.

toyota fj cruiser transfer case oil filling

Transfer Case Oil Change How To

Amsoil severe gear SAE 75w-90 oilOn an off-road adventure in a 4WD vehicle, the transfer case distributes the power front and back.  The 2007  Toyota  FJ  Cruiser  maintenance  schedule, shows that Toyota recommends changing the gear oil in the transfer case every 30,000 miles depending on usage.

Sure you can bring your rig into the local shop but changing the transfer case’s gear oil yourself is an easy maintenance activity that can be completed by any back yard mechanic. Besides saving money, you will also learn a little more about your 4×4 adventure vehicle which can only help when your on the trail.

We checked our 2007 Toyota FJ Cruiser owners manual and found we would need 1.5 quarts of Hypoid gear oil API GL-5 (Toyota Recommends oil viscosity: SAE 75W-90).  We went with Amsoil Severe Gear SAE 75W-90 synthetic extreme pressure lubricant, formulated for sever duty applications.

We also grabbed new gaskets for the fill and drain plugs as well as a funnel with flexible tube (Hopkins FloTool 10704 Spill Saver Measu-Funnel) for getting the thick gooey oil into the transfer case.  The only tools needed are a oil catch pan, 24 millimeter socket, ratchet and a torque wrench.

Start by putting the rig on a flat, level spot to ensure good draining and proper refill. Tip: clean around the transfer case with soapy water and a scrub brush to remove the road and trail gunk.  This will prevent any dirt from falling in to the case while changing the oil.

toyota fj cruiser transfer caseUsing the 24mm socket remove the fill plug located in the middle(ish) of the transfer case.  By removing the fill plug first, the housing will be able to breath allowing the gear oil to drain more quickly.

With the oil catch pan in place remove the drain plug, located on the bottom of the transfer case, using the same 24mm socket. If your going to use gloves, this is the time to wear them.

Once the oil is fully drained, wipe the area clean and re-insert the drain plug with a new gasket and hand tighten.  Set the torque correctly on your torque wrench and tighten down the drain plug.  The Toyota maintenance manual states the torque specifications for both the drain and fill plugs as 27 foot pounds for our 2007 Toyota FJ Cruiser.

Remember that funnel with flexible tube?  Getting the oil out of the bottle and into the transfer case through that little hole can be tricky.  One of the advantages of the Hopkins FloTool 10704 Spill Saver Measu-Funnel is that the flexible tube funnel cap will screw directly on to the Amsoil quart bottles.  The cap has an open and close position preventing spills as you position the bottle and hose into place.

Squeezing out thick gear oil through the tube takes awhile.  It works best if you give the quart bottle a few long squeezes and than allow air to flow back into the bottle followed by a few more good squeezes.

The transfer case on our 2007 Toyota FJ Cruiser holds 1.5 quarts.  Checking the fill level on flat ground is easy.  The oil should begin to run out or be just about to run out (within 5mm of the fill opening).toyota fj cruiser rear differential fluid level

Hand tighten the fill plug with a new gasket followed by torquing down the plug to Toyota specifications (27 ft./lbf for the 2007 FJ Cruiser).

Once everything is buttoned up, give the plugs one more wipe down and check for leaks followed by a drive around the block.  Double check for drips and leaks when the test drive is complete.

Keeping the power distributed to the front and rear axles in key in a 4×4 vehicle.  Ensuring the transfer case continues to do its job takes only a little maintenance in the form of an oil change.  Changing the gear oil in the transfer case of a Toyota FJ Cruiser is a simple maintenance job anyone can do with a few tools, a little know how and about 60 minutes.

Don’t forget to change the oil in the rear differential too while your at it. You can learn how with our rear differential oil change how to video.

voodoo blue fj cruiser driving through snow 4x4 trail

Off-Road Adventure Christmas List

happy holidays explore the new yearWhat would the Christmas season be without lists of cool off-road adventure stuff we hope to find under the tree when we come running down the stairs.  Like a giddy teenage boy on prom night believing anything is possible, we checked all around, asked friends and searched out the Internet for cool gifts and this is our ultimate 4×4 adventure Christmas list.

  • MSR XGK EX Extreme Condition Stove: This small stove is capable of blast furnace output and will boil water in under three minutes (kerosene fuel).  Easily serviceable in the field, this is the stove to bring along on a three month adventure into the Himalayas or an over night camping trip in the Hundred Acre Woods.
  • Maxtrax Vehicle Extraction: There are times a winch isn’t practical such as alone on the sand or snow field with nothing to anchor too.  Sure you can pull the spare tire, dig a hole and build a dead-man anchor or you can pull out Maxtrax, set them in place and drive on out.  Maxtrax makes vehicle recovery an easy one-man job.
  • Petzl E99 PG Tikka XP 2 Headlamp: You can never…  NEVER… have enough headlamps within easy reach.  Whether you’re making a rig inspection on the trail, gathering fire wood, finishing a late night field repair, trying to find stuff in your tent or looking for the perfect tree to relieve yourself after dark, a hands free light is a must.  And just to be clear, one headlamp is not enough.  Spelunkers bring a light, a backup light and a backup to their backup…  as a minimum.  Keep one or two in the rig, one with your camping gear, one with the cooking equipment, one in the emergency kit…  you get the idea…  Don’t forget lots of spare batteries with each.
  • ARB Fridge Freezer: There is nothing like pulling out a steak for dinner along with a cold drink on day five of an off-road adventure.  And what would single malt scotch be without ice as you sit around the fire with a fine cigar.  The ARB fridge freezer is a 12 volt, low amp draw solution to a cooler full of melted ice sloshing around in the back filled with soggy groceries.
  • Pelican 1630 Case: What better way to be ready to go on a adventure than always having your gear packed in waterproof cases waiting to be strapped to the roof or stowed in the back of the pickup.  These cases will keep everything inside dry and safe from the shocks and knocks of the road.  In the unlikely event of an emergency water landing, the Pelican Case will double as a flotation device.
  • SPOT Satellite GPS Messenger: Hula Betty gets a little anxious when we’re off the grid for several days.  The Spot lets you send an “OK” message telling folks you’re fine and not to worry.  And just in case your not ok, the Spot will let you send out an “SOS” with your exact GPS coordinates to the authorities, alerting them that you need help.  The Spot is satellite based so no worries if cell coverage is non-existence.
  • Gerber EVO Jr. Serrated Edge Knife: Remember how your grandfather always had a pocket knife on his belt.  He was prepared for any task that came up.  We’re not talking about a rebuild your engine multi-tool or a gator skinning 18 inch Rambo saber blade.  No, just a simple pocket knife with a good sharp blade that will effortlessly cut parachute cord, slice cleanly through a wad of duct tape or whittle a good sharp stick.  In the hands of anyone who understands the versatility of a pocket knife, the uses are endless.
  • 12-by-20 Super Heavy-Duty Tarp: What can you make out of a tarp?  How about a brooch, a hat, a pterodactyl… The uses for a tarp are up there with a good pocket knife or duct tape.  Many times when on an adventure we’ve turned a tarp into a makeshift shelter staying dry when the weather turned worse than expected.  A tarp also makes an excellent awning for an afternoon siesta or keeping the camp kitchen dry while cooking up a pot of chorizo chili.
  • Kermit Chair: Sure there are hundreds of camp chairs you can pick up at any supper store.  Hell, just look in the back of any soccer mom’s minivan and you’ll find half a dozen different choices.  But none of them are particularly comfortable.  The Kermit Chair lets you pack tight, without giving up on comfort, design and beauty.  No more slouchy seats and squishy backs that you slump into.  These chairs support your tired body as you relax around the fire.  These guys pay attention to details, the add-on cup holder, it took over a year to develop.
  • Wool Blanket: We always have an emergency kit in the rig where ever we go; work, grocery store, skying, or the Arctic.  And in that kit are two wool blankets.  Unlike cotton, wool blankets keep you warm even when they are wet.  They also make great insulated padding when your sleeping on the cold hard ground.  You can even do your best Clint Eastwood imitation (anyone remember “The Good, The Bad and The Ugly”) turning it into a poncho if you have to hike out.
  • Chaser Off-Road Trailer: A fully equipped off-road adventure trail with 46 cubic feet of storage, lots of ground clearance to keep up with the rig, fold out trailer top tent, separate deep cycle battery with solar charging panel for running a fridge and electronic gadgets, fold out kitchen or work area, 19 gallon water tank…  This is roughing it easy.  While it might be a stretch to shove under the tree but you could always leave it in the driveway and set a tree on top.
  • Katadyn Pocket Water Microfilter:  If you plan on a long off-road adventure, eventually you will come to the conclusion that you can not carry all the water you need.  Depending on were you are exploring you will find all sorts of nasty critters swimming around in the local water source (even if it comes out of a tap or clear mountain creek).  The Katadyn Pocket Filter will remove all giardia, fungi, parasites, cholera, typhoid, cryptosporidia, salmonella and other harmful bacteria, parasites, and germs by forcing the water through its ceramic 0.2 micron filtration element.  This is the water filter that is standard issue for international Red Cross field workers.
  • Where Is Joe Merchant? A Novel Tale: We all know I’m not much of a speller…  you’ve read this blog right?  Not much of a reader either…  Dyslexics untie!  But for any die hard Parrot Head this one is a must…  Frank Bama takes off on an adventure in his sea plane to find his ex-girlfriend’s brother, the notorious rock star Joe Merchant.  More a collection of short stories that expand on many of the “Fruit Cakes” song lyrics.  If this doesn’t get you in the mood for an adventure nothing will.
  • Danner Quarry GTX 6 Boots:  Hunting down firewood, hustling up hills to take a baring, running out a winch line, digging for buried treasure or kicking down doors to save the Swedish bikini full-contact origami team requires a sturdy set of boots .  More twisted ankles, bruised toes and blistered feet occur because of flimsy footwear.  Out on the trail is not the place to show off your pedicure in flip flops. Traipsing around in the bush with blisters is low on entertainment value and no way to go through life.  A good set of boots will keep your feet cozy, ankles supported and possibly save you from a snake bite.

This list could go on forever, but Santa only has so much room in his sleigh…  I wonder if it has 4WD… Maybe he should get a Defender 110 or how about a Land Cruiser FJ45.

What’s on your list?  Tell us your great ideas for gear under the tree, stuffed into a stocking or sitting out in the driveway.

toyota fj cruiser adding rear differential oil

Changing Rear Differential Oil On The FJ Cruiser

toyota fj cruisdr rear differentialThe gear oil in your rig keeps friction to a minimum and ensures the long life of your differential gears.  Changing the oil in the rear differential is an easy maintenance activity that keeps your off-road rig motoring forward, saves money and allows you to learn a little more about your 4×4 adventure vehicle (you never know when that knowledge will come in handy on the trail).

The first big decision is what oil to use. The Toyota maintenance manual for a 2007 FJ Cruiser specifies: Hypoid gear oil APL GL-5. We went with Amsoil Severe Gear SAE 75W-90 synthetic extreme pressure lubricant, formulated for sever duty applications.  Our FJ Cruiser is equipped with an e-locker which means it requires between 3.01 and 3.12 quarts to properly fill the rear axle housing.

The other item to pick up before you get started are new drain and fill plug gaskets (part# 1215710010).  Unless your on the trail working a field repair, don’t try save a few bucks by reusing these little items.  (Get a complete set of FJ Cruiser differential and transfer case gaskets they will also fit you Lexus GX470 and 4Runner)

Most back yard mechanics will have the tools required to perform this simple activity.  The tools you will need include:

Ok enough shop talk and prep…

Put the rig on a flat level spot to ensure good draining and proper refill. Tip: clean the axle housing with soapy water and a scrub brush to remove the road and trail gunk.  This will prevent any dirt from falling in to the differential while changing the oil.

Using a 24mm socket remove the fill plug located in the middle(ish) of the rear axle housing.  By removing the fill plug first the housing will be able to breath allowing the differential oil to drain more quickly.

With the oil catch pan in place remove the drain plug, located on the bottom of the rear axle housing, using a 24mm socket. If your going to use gloves, this is the time to wear them.

toyota cleaned differential drain and fill plugsThe drain plug has a magnetic insert designed to attract and hold tiny metal shavings that become suspended in the oil.  Yes these are little bits of your gears.  Inspect the drain plug checking for any chunks and observe how much has accumulated.  This will give you an idea of what has been going on inside your differential.

Even with the fill plug removed, it will take a while for the oil to completely drain, which is good since it will give you time to grab the shop rags and clean the plugs, removing all the gunk and accumulated metal shavings.  When your done the plugs should be clean and dry.  Don’t forget which is which.

Once the oil is fully drained, wipe the area clean and re-insert the drain plug (Be sure to use the correct plug) with a new gasket and hand tighten.  Set the torque correctly on your torque wrench and tighten down the drain plug.  The Toyota maintenance manual states the torque specifications for both the drain and fill plugs as 36 foot pounds for our 2007 Toyota FJ Cruiser.

Remember that funnel with flexible tube?  Getting the oil out of the bottle and into the axle housing through that little hole can be tricky.  One of the advantages of the Hopkins FloTool 10704 Spill Saver Measu-Funnel is that the flexible tube funnel cap will screw directly on to the Amsoil quart bottles.  The cap has an open and close position preventing spills as you position the bottle and hose into place.

Squeezing out three plus quarts of thick 90 weight through the tube and into the axle housing will take awhile so get comfortable.  It works best if you give the quart bottle a few long squeezes and than allow air to flow back into the bottle followed by a few more good squeezes.toyota fj cruiser rear differential fluid level

Checking the fill level on flat ground is easy.  The oil should barely begin to run out or just about to run out (within 5mm of the fill opening).

Hand tighten the fill plug and new gasket followed by torquing down the plug to Toyota specifications (36 ft.*lbf for the 2007 FJ Cruiser).

Give everything one more wipe down and check for leaks followed by a drive around the block.  Double check for drips and leaks when the test drive is complete.

There comes a time in every rig’s life when it’s gear oil needs a change to keep all the gears turning smoothly.  Changing the rear differential oil on a Toyota FJ Cruiser is a simple maintenance job anyone can do with a little know how and about 60 minutes.

Be sure to change the gear oil in the transfer case as well. Learn how with our step by step transfer case oil change video.

swr meter CB radio test setup

Can You Hear Me Now…

cb antenna quick release spring base
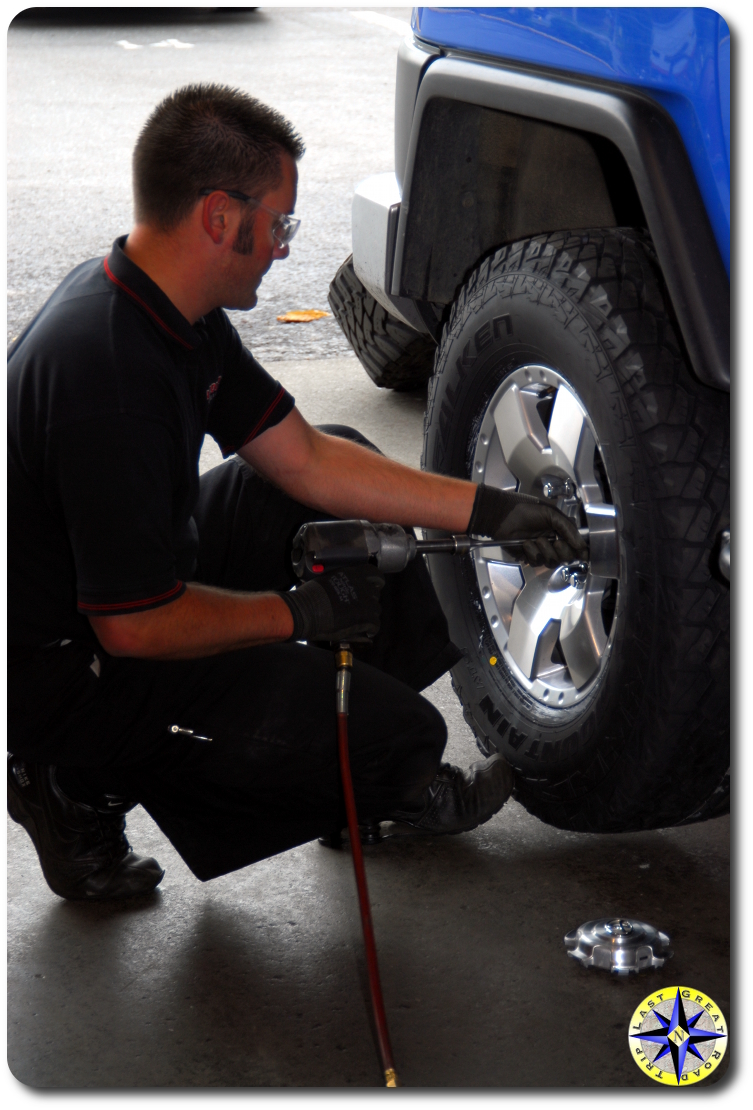
Communication when off-road is key to safety and fun.

The most popular method of trail communications has to be the CB radio. Available at almost every discount department store, a CB radio setup provides good vehicle to vehicle coverage while on the trail.  On outings with many off-road clubs, a CB is mandatory if you plan to participate in a club-sponsored ride.

If you ask Hula Betty, she will tell you there is one universal truth about me…  No matter what, and I really mean it, no matter what, I will forget one thing when I go on an off-road adventure.  And for a while the one thing was a CB antenna which meant I would have to stop along the way and pick one up.  On the good side this has given me a nice collection of CB antennas and an opportunity to try them all out.

The line up includes:

CB radio antennas have two functions…

  1. Capture radio frequency waves and convert them into electrical signals
  2. Radiate out radio-frequency signals, which is done best when the length of the antenna precisely matches the wavelength of the transmitted radio frequency (1 – 40)

CB antenna flexIf they all do essentially the same thing is there a difference in CB antennas you ask. CB antennas come in various sizes, flexibility and with different methods of fine tuning their efficiency.

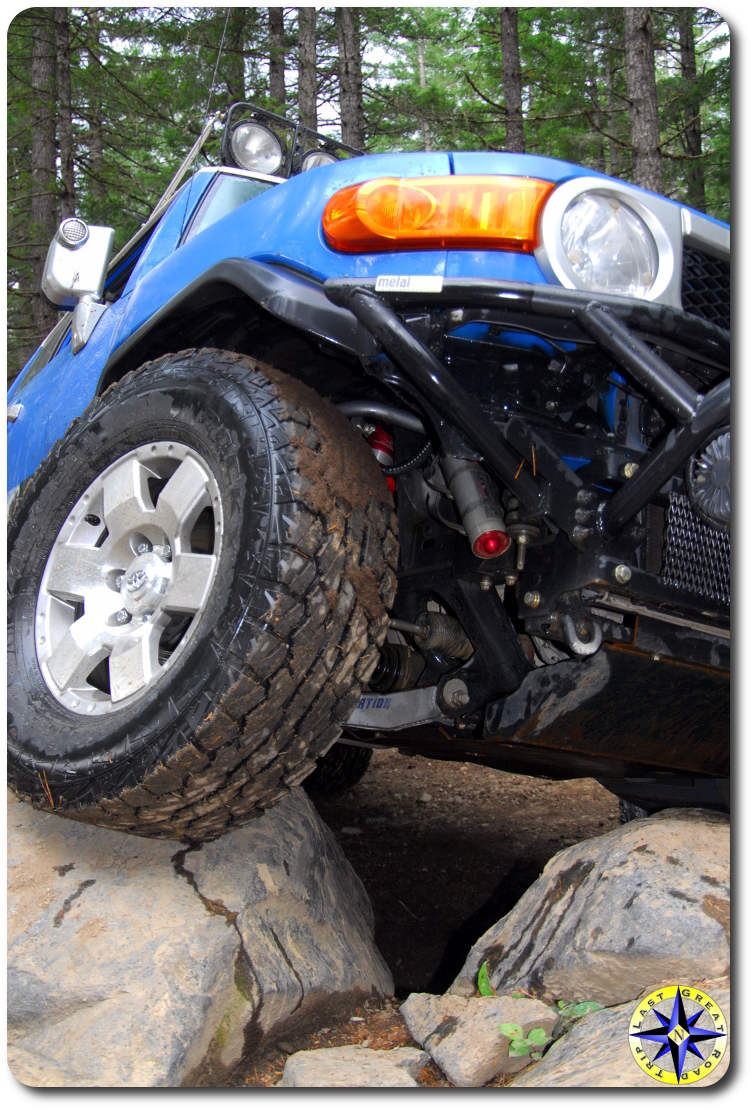
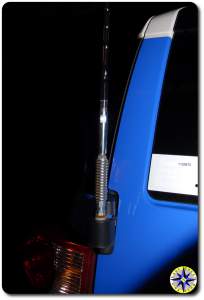
A CB radio can broadcast for miles but it is based on line of site.  For this reason we use a four foot antenna which mounted on our rear door hinge stands above the roof and any stuff packed in the roof rack giving it a clear view of the horizon in every direction.

SWR (standing wave ratio), is a measurement of how efficiently your antenna system will radiate the power available from your radio. In simple terms, your radio would like to radiate all of its power, but can only do so if the other components cooperate. Bad coax and mounts, inefficient ground plane or poorly tuned antenna can cause system backups.  CB antennas need to be tuned to be as efficient as possible and by setting your antenna’s SWR you reduce the restriction of radiated power. The easiest way to understand the concept is to think of it in terms of water flow. That is, if you put a nozzle on the end of a fire hose, your potential output will be restricted by the outlet and water pressure backs up into the pump. Tuning your antenna opens the nozzle to full.  Poorly tuned antennas restrict the flow of the output frequency and can cause damage by backing up all that power into the CB radio.firestik designer CB antenna

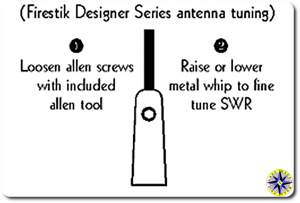
If all radios only transmitted on one channel, it would be a much easier task to design antennas. As it is, there are 40 CB channels to contend with.  CB antennas can only be made to resonate at one specific frequency (channel). The goal of the antenna manufacturers is to build the antenna to resonate at a frequency in the middle of the band (channel 19) and make it broad- banded enough to keep the other frequency’s related SWR at the two extreme ends (channel 1 and Channel 40)  of the band below 2.0:1.  Since each radio system is unique, the final tuning is left to you.  How you go about fine tuning your antenna varies slightly.

firestik II cb antenna tuning
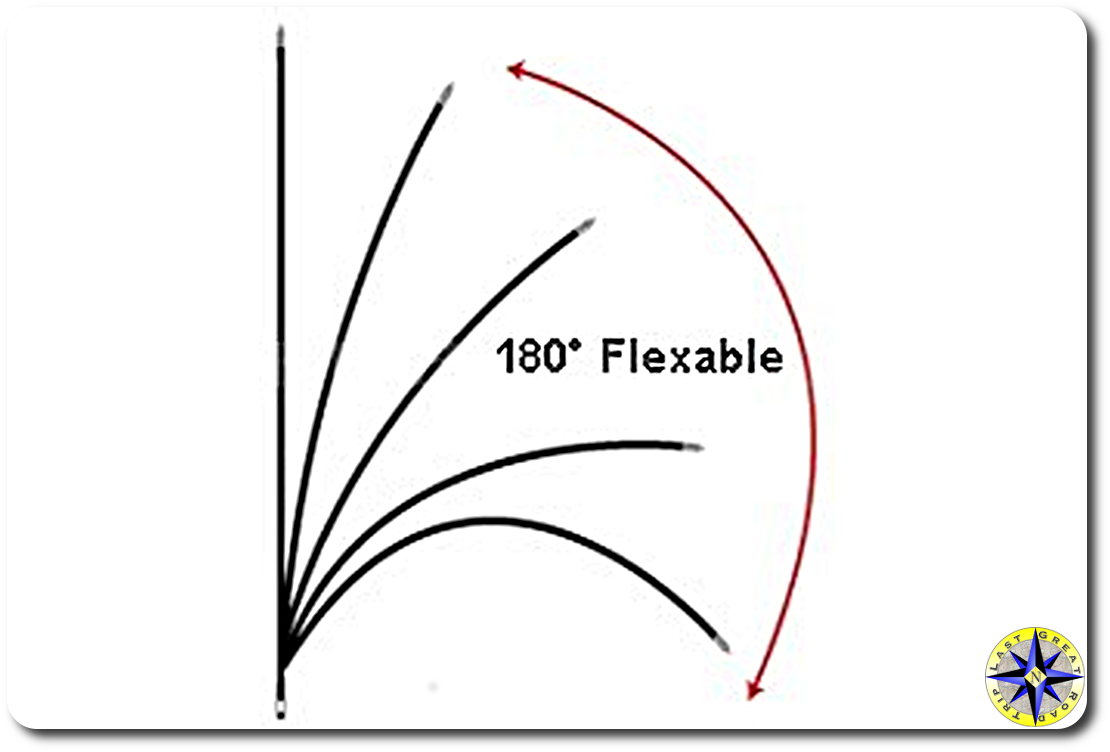
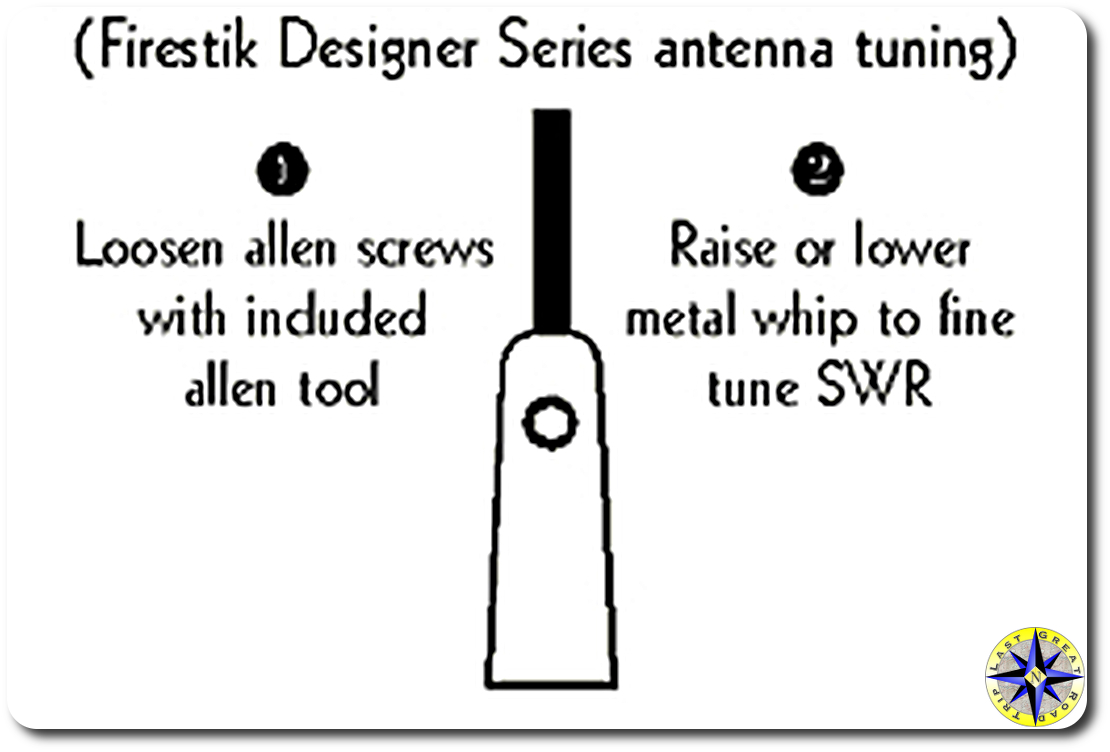
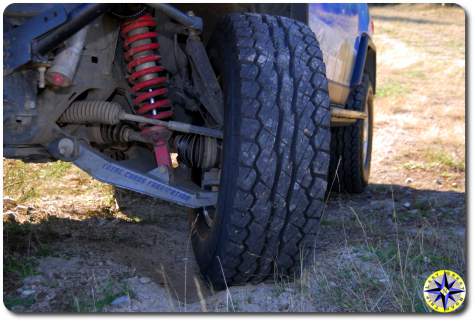
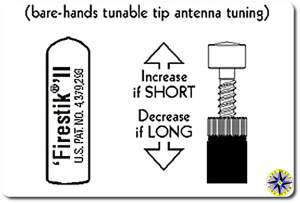
The three models of antenna we now have, are all four feet long with adjustable tips.  Because the antennas stick up high, they run into low branches, overhangs and ferry boat cross beams.  The Wilson flex-4 is designed to bend when it encounters solid objects.  In fact it can double back without cracking or breaking.  The K40 and Firestik requires a spring base that allows the antenna to fold back instead of splintering the fiberglass.  When properly adjusted they all broadcast and receive radio signals well. But here is where they seem to differ the most to us.  The K40 requires a small allen to make adjustments.  The Flex-4 requires a small screw driver for adjustments.  The Firestik uses a turn screw that can be adjusted by hand.  Once you have your antenna dialed in for your CB radio you should not have to worry about it again.

So how do you fine tune you’re CB antenna?  You need a SWR meter, which you can pick up from Radio Shack.  You may want to check with your local 4×4 club to see if anyone there has a SWR meter you can borrow.

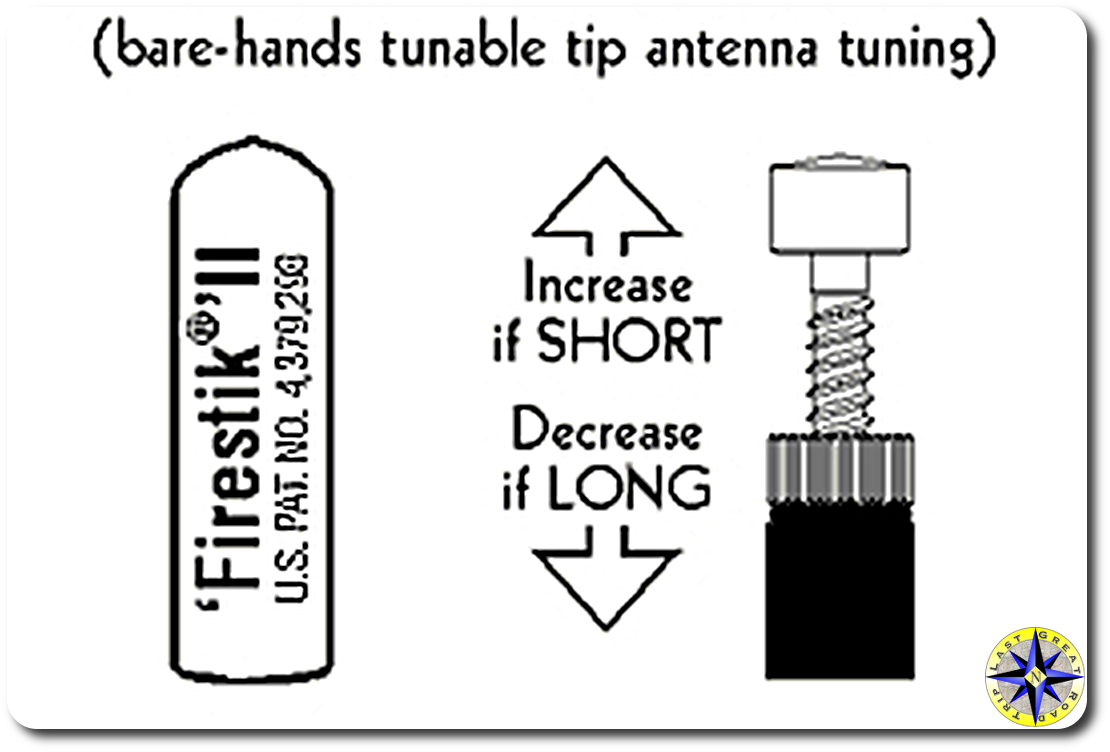
You need to understand two basic points before adjusting the length of your antenna (fine tuning it):

  • If the SWR on channel 40 is higher than that on channel 1, your antenna is too long.
  • If the SWR on channel 1 is higher than that on channel 40, your antenna is too short.

Start by finding a suitable location to park your rig. There should be no obstructions, such as trees or buildings, within 10-15 meters of your antenna.  Make sure that you’re inside the rig with the doors and windows closed to ensure an accurate reading.  It is important to have your antenna properly grounded to your rig or it may not operate at all.

IN GENERAL HERE IS HOW YOU FINE TUNE YOUR ANTENNA (follow the directions for your specific SWR meter).

Hook up the SWR meter. Disconnect the coaxial cable from the back of the radio. Reconnect this end of the cable, which leads back to the antenna, to the SWR meter in the slot marked “antenna” or something like that.   Use the jumper lead and connect your radio and the SWR meter through the connection marked “transmitter”or something like that.  You are placing the meter between the CB and the antenna.

  1. You will initially calibrate the meter for your system. Set the switch on the SWR meter to “CAL.”
  2. Turn the radio the Channel 1 (40 on the second pass).
  3. Key the microphone (depress the button and hold it) but do not speak into the microphone.
  4. Turn the knob on the SWR meter labeled “CALABRATION” until the needle reaches the setting position at the end of its range.
  5. Release the transmit key.
  6. Set the function switch to “SWR”.
  7. Key the microphone again without speaking into the microphone.
  8. Quickly record the reading on your SWR meter and release the transmit key on your microphone.

You are now going to repeat this process for channel 40.

Depending on your readings, lengthen or shorten the antenna appropriately and repeat your tests.  Make small adjustments as you work to optimize your antenna and remember:

  • If the SWR on channel 40 is higher than that on channel 1, your antenna is too long.
  • If the SWR on channel 1 is higher than that on channel 40, your antenna is too short.

The objective behind tuning your antenna is to make these two readings identical or as close as possible. Getting down to a ratio between 1.5:1 and 2.0:1 will produce an excellent broadcast signal that will not harm your CB radio and broadcast clearly across all 40 CB channels.

If you only communicate on one or two adjacent channels anywhere within the band, you can tune your antenna to achieve optimum performance on those channels.  However, most people prefer to use the entire bandwidth when tuning.

This procedure can sound a little cumbersome, but fine tuning your rig’s CB antenna only takes a few minutes and is vital in protecting your CB Radio and optimizing its performance .  Each antenna manufacture claims they have power output improvements and other performance enhancements that set them apart.  We found them all to operate the same on the trail when tuned correctly.  Of course it could be our set up and this is not a scientific test by any means.  Can you hear me now.

Toyota fj cruiser splashing muddy water

Falken Rocky Mountain ATS Review… Be Brutally Honest!

falken tires fj cruiser rockThe folks over at Discount Tire asked us to put a set of Falken Rocky Mountain ATS to the test and then be brutally honest in our review.  It’s a tough job but somebody has to do it!

Every tire carries a wealth of information…  the industry’s own version of truth in manufacturing.  To make informed tire choices you need to understand the ABCs of the tire industry.   A quick read of Discount Tire’s tire dictionary will give you a big leg up when comparing tires.

Some tire facts of the Falken Rocky Mountain ATS we tested: LT285/70R17D1 121S B

  • type- light truck
  • size – 285/70/17
  • construction – radial
  • plies – D (8 plies)
  • load – 121 (3,197 lbs)
  • speed rating – S (up to 112mph {don’t try to test this one})
  • temperature grade – B

In order to run these tires through a real world situation we opted to have the guys at Discount Tires mount up our 285/70/17 on stock rims with traditional lead weight balancing.   Our rig is part hard core 4×4 trail rig, part overland explorer and come Monday, daily driver.   That means these Rocky Mountain all terrains need to balance performance across all sorts of driving conditions.  The first thing we noticed is these tires look good on the rig.  Rugged, multi-angled grooves and blocked tread with a 50,000 mile warranty… But can they dance when the when things get a little dirty.

To us, all terrain means dirt, rocks, mud, hills, washboard gravel and water.  In order to tackle all these conditions we aired them down to 25 psi and hit the trails of the northwest.  On loose dirt and rocks where gravity pulls downhill, the tires maintained a grip on the ground without sliding, allowing our gears to work their magic and keep the rig motoring under control down the hills.

falken rocky moutain ats total chaos long travelOne of our favorite thing is to bomb down the old logging road (not so closed course and definitely not a professional driver). Opening it up on the gravel, the Rocky Mountain ATS’ felt confident as we zipped through the corners and raised a little dust.

When you think 4×4 adventures and off-road driving, climbing over stuff in the way is usually what comes to mind.  We motored over to the rock garden in order to see how the Falken tires held up to the boulders.  Even with mud all around, the all terrains grabbed and climbed up rocks as they contoured to the obstacles allowing us to keep a controlled forward momentum.

With all the dirt it was only a matter of time before we looked to wash off the rig and the north west has plenty of puddles to “clean up” in.  The tire’s aggressive tread design shed water and found traction in the mud below letting us make a big splash on the trail.

After a day of wheeling trails, we can honestly say Falken’s Rocky Mountain ATS are a strong tire capable of living up to its all terrain designation.

falken rocky mountain ats turning on top big rockAnd what about daily driving?  We put 2,000 miles on these tires in a short two weeks.  Think four trips from Seattle WA. to Eugene OR…  Hula Betty just started university.  The rig covered wet high ways, worn down city streets  and pot hole filled back roads.  With that much travel, we appreciated the smooth quiet ride and sure footed grip, especially at 70+ mph on the wet pavement… Have you driven I5?  It’s a high speed trucking route where cars are allowed as long as they stay out of the way.

Balanced on and off road performance along with daily driver comfort makes Falken’s Rocky Mountain ATS a good choice for anyone interested in a tire that will play hard on the weekend and show up for work come Monday.

Guess our first impressions of the Falken Rocky Mountain ATS were right… Who Knew.

bowl chorizo sausage stew

Hungry Man Off Road Adventures

bowl chorizo sausage stewA big part of our off-road adventures is getting to camp in the middle of no where under the stars.  Years ago that would have meant a staple diet of Top Romen.  Since then we’ve stepped up to more gourmet fair.

There are lots of high quality ingredients that can be pulled together to make a gourmet one pot meal without resorting to expensive dehydrated pre-packaged backpacking meals or raiding the Army Surplus for cardboard tasting MREs.  A few simple tricks and you can create a favorite dinner of ours, spicy black bean chorizo chili.

  • 1lb ground Mexican chorizo sausage
  • 1 egg
  • 1 quart spicy black bean soup (we like Pacific Natural Foods)
  • 16 oz canned black beans
  • 12 oz frozen corn kernels
  • 4 oz can of diced mild chiles
  • hand full of diced Nopalitos cactus (try Nopalitos – Tender Cactus by Dona Maria)
  • spices (this is just a suggestion…  we like it spicy…  keeps the mosquitoes at bay)
    • dried minced onion to taste about 2 tablespoons
    • dried garlic flakes to taste about 1 teaspoon
    • ground cumin to taste about 1 tablespoon
    • ground oregano to taste about 1 teaspoon
    • fresh cilantro to taste about 2 tablespoon
    • ground chipotle to taste 1/4 teaspoon

Pre-trip food prep makes gourmet meals on the trail much simpler and manageable when the light is fading and you’re hungry.  Start by finely chopping the cilantro.  In a medium mixing bowl lightly beat the egg.  Add in the cilantro and chorizo kneading it all together.  Keeping fresh ingredients from spoiling on the trail takes nothing more than a small cooler and a  source of cold.  Put the sausage mixture into a zip lock bag…  and FREEZE it rock hard, it will be its own source of cold.

Dice up the nopalitos and place them along with the rinsed beans, corn, and chiles into a zip lock bag and freeze it as well.  Put the remaining spices into a zip lock bag (no you don’t need to freeze the spices).

On the morning of your off-road adventure pull everything out of the freezer and put it into the cooler (don’t forget the spices).  By the time you reach camp that night and are ready to cook dinner, they should be thawed out…  put a couple of cold beers in the cooler and you wont need ice to keep everything cool.

Cooking it all up…  We do this all in one pot over a camp stove.  If you’re adventurous you can try it over a fire.  In a pot over medium heat brown the sausage.  You can drain the grease but why…  everyone knows camp food has no calories, is healthy and good for you…  no matter what.   Once the sausage is browned, add the bean soup, corn, chiles, beans, and nopalitos, along with the spices.  Allow it all to simmer for 10 minutes or so stirring every once in awhile.

Serve it up in a bowl with blue corn tortillas chips.  That is all there is too it. A great one pot meal that will make you a rock chief with all your friends on your next off-road adventure.

Serving tweaks:

  • Top a little crumbling cheese, Queso Fresco or Panela
  • Serve over cooked brown rice
  • Line bowl with a corn tortilla and server chili on top
  • Dab of sour cream on top
2011 toyota fj cruiser driving

Rumors Of Its Death Are Highly Exaggerated (2011 FJ Cruiser)

Since the introduction of Toyota’s FJ Cruiser  in 2006 (it was called a 2007), rumors run rampant that THIS was the last year of production.   With forum poster trying to impress others with their insider scoop of the rigs demise, its death has been declared again and again.  Yet each year Toyota has continued to release a new model year.

Toyota has announced the 2011 FJ Cruiser (FJC) will be coming off the assembly line.  A couple of notable updates for the 2011 model year include:

  • Two new colors
    • Calvary Blue
    • Quicksand
  • New Trail Teams Special Edition in Army Green
  • New Audio Systems, Including  Available JBL Premium System
  • Standard Locking Rear Differential (standard on manual transmission/ optional for automatic)
  • Improved Visibility and Rear Seat Access (Didn’t know it needed improvement)
  • Standard iPod® Connectivity and XM Satellite Radio

Out of the box the FJC 4×4 has ground clearance of 9.6 inches, 260 hp @ 5,600 rpm, 271 lb-ft @ 4,400 rpm, dual transfer case and a 41.84:1 crawl ratio making it a capable trail rig.  In fact for 2010 Consumer Reports put the Toyota FJ Cruiser at the top of its “Best Off-Road” vehicle list.

If you want the full scoop on the upcoming 2011 FJ Cruiser take a look at the Toyota 2011 FJ Cruiser product information from Toyota’s press room.

We’re glad to see the rig is maintaining its funky style, white roof and solid off-road performance. And while it’s not voodoo…  the new blue is pretty sick.

No idea how long Toyota will continue to produce this rig but we are sure it will be produced in 2011.

UPDATE: Toyota announced in 2013 that 2014 is the last year of production of the FJ Cruiser for the U.S. market. With thousands of Toyota FJ Cruisers on the road there will be plenty of them around for years to come so that everyone can continue to use them for what they were intended, off-road adventures.

fj cruiser total chaos long travel falken rockie mountain tire

Falken Rocky Mountain Tires First Impressions

discount tire mountingAfter 65,000 miles it was time for some new tires…  These things don’t last forever you know.  Take a quick tour of the Internet and you quickly discover there are lots of choices out there so we had some decisions to make.

The Blue Bunny is part daily driver, part extreme off-road rig and part overland explorer which means we needed a tire that feels at home in all sorts of conditions including the rain and snow of the pacific northwest.  With this in mind we decided to turn to a pro and give Travis over at Discount Tires a call…  Ok really we just emailed him since it was 2:00 am, but let me tell the story in my own way.  After a few email exchanges back and forth as well as a real call to discuss what we wanted out these tires Travis had a suggestion for us.  He had just returned from the 2010 North America JK Experience where he had seen tires put through their paces in the one of the toughest Jeep challenges anywhere.

Newly developed by Falken the Rocky Mountain ATS tire delivers tough off-road traction while at the same time providing highway comfort and handling. Rugged design and long tread life makes it an exceptional value. Our 285/70/17 size (Rocky Mountain is available in 15-inch to 20-inch sizes) feature a 3-ply sidewall construction for great off-road durability.discount tire spin balancing

Some of the features Travis pointed out included:

  • Four wide, aggressive multi-angled grooves for clearing out water, mud and snow
  • Block tread edges providing solid traction and control
  • Smooth quite ride (remember the Blue Bunny still serves daily driving duties)
  • Two steel belts and 3-ply sidewalls for protection and strength
  • 50,000 mile tread life warranty

Now as everyone knows, tires are only as good as the dealer who stands behind them.  Discount Tires has 750 stores in 22 states making it the world’s largest independent tire and wheel retailer today.  These guys will also drop ship tires directly to your doorstep if you plan on mounting them yourself or at another local tire shop.

tightening lugnut on new tiresWe headed down to our local Discount Tire dealer in Bremerton, WA. where Nick and the guys took care of us.  One of the cool things about showing up with a handful camera gear is that it gets you into places that are normally off limits.  With the rig in the bay we got to go back and see everything as the guys quickly went to work.  Sure on the trail you can break a tire bead and pull it off a wheel with a hi-lift jack but when professionals mount tires they get to use all the cool tools.

In no time the guys had the new rubber mounted on our original stock rims and were throwing them on the balancing machine.  You really do have to credit the guy who figured out how to apply centrifugal force and computers together in a way that would perfectly balance all that alloy and rubber.

Ok I know I’m gushing a little but really the crew there was great.  We chatted about some of the adventures we’d been on and a couple still in the planning stages.  We talked tires… go figure…  and got to see how it all works behind the scenes.  While this wasn’t an NASCAR pit time, they did have us in and out in less than thirty minutes.  And remember that stand behind the tire thing.  These guys warrant their tires from any of those 750 stores across the country.east bremerton discount tire staff

The first thing you notice…  dang these are smooth and quiet on the highway…  For a while now I thought I’ve been loosing my hearing having to crank the stereo up to obscene levels to hear it over the road noise…  But no more.  I can now enjoy the stereo and carry on a conversation cruising down the highway.  They also hold the road well and let us carve through the corners without worry…  Remember though we are in a rig not a Porsche so our carving is relative…  but it feels good through the corners.  And on a short jaunt down some two tracks the tires responded nicely.  Not to mention they look pretty sick on the rig.fj cruiser new falken rockie mountain tires

Of course we plan on putting these Falken Rocky Mountain ATS through more serious off-road tests soon and we’ll let you know how well they hold up to the trails, mud and snow.  Look for a longer term review soon but for now these are looking like a good all-terrain choice.

—– follow up —-

Well after a bunch of miles we put up the results of our Tire Test of Falken Rocky Mountain All-Terrains.  Check out the video and write up for more info.