toyota fj cruiser adding rear differential oil

Changing Rear Differential Oil On The FJ Cruiser

toyota fj cruisdr rear differentialThe gear oil in your rig keeps friction to a minimum and ensures the long life of your differential gears.  Changing the oil in the rear differential is an easy maintenance activity that keeps your off-road rig motoring forward, saves money and allows you to learn a little more about your 4×4 adventure vehicle (you never know when that knowledge will come in handy on the trail).

The first big decision is what oil to use. The Toyota maintenance manual for a 2007 FJ Cruiser specifies: Hypoid gear oil APL GL-5. We went with Amsoil Severe Gear SAE 75W-90 synthetic extreme pressure lubricant, formulated for sever duty applications.  Our FJ Cruiser is equipped with an e-locker which means it requires between 3.01 and 3.12 quarts to properly fill the rear axle housing.

The other item to pick up before you get started are new drain and fill plug gaskets (part# 1215710010).  Unless your on the trail working a field repair, don’t try save a few bucks by reusing these little items.  (Get a complete set of FJ Cruiser differential and transfer case gaskets they will also fit you Lexus GX470 and 4Runner)

Most back yard mechanics will have the tools required to perform this simple activity.  The tools you will need include:

Ok enough shop talk and prep…

Put the rig on a flat level spot to ensure good draining and proper refill. Tip: clean the axle housing with soapy water and a scrub brush to remove the road and trail gunk.  This will prevent any dirt from falling in to the differential while changing the oil.

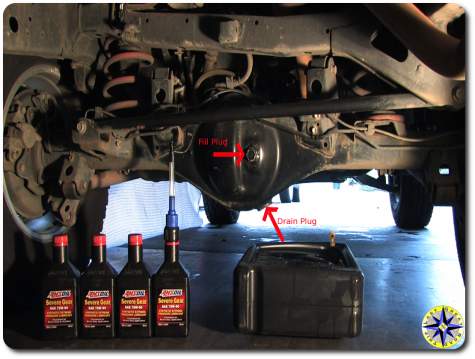
Using a 24mm socket remove the fill plug located in the middle(ish) of the rear axle housing.  By removing the fill plug first the housing will be able to breath allowing the differential oil to drain more quickly.

With the oil catch pan in place remove the drain plug, located on the bottom of the rear axle housing, using a 24mm socket. If your going to use gloves, this is the time to wear them.
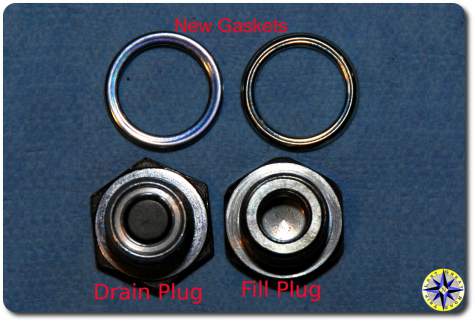
toyota cleaned differential drain and fill plugsThe drain plug has a magnetic insert designed to attract and hold tiny metal shavings that become suspended in the oil.  Yes these are little bits of your gears.  Inspect the drain plug checking for any chunks and observe how much has accumulated.  This will give you an idea of what has been going on inside your differential.

Even with the fill plug removed, it will take a while for the oil to completely drain, which is good since it will give you time to grab the shop rags and clean the plugs, removing all the gunk and accumulated metal shavings.  When your done the plugs should be clean and dry.  Don’t forget which is which.

Once the oil is fully drained, wipe the area clean and re-insert the drain plug (Be sure to use the correct plug) with a new gasket and hand tighten.  Set the torque correctly on your torque wrench and tighten down the drain plug.  The Toyota maintenance manual states the torque specifications for both the drain and fill plugs as 36 foot pounds for our 2007 Toyota FJ Cruiser.

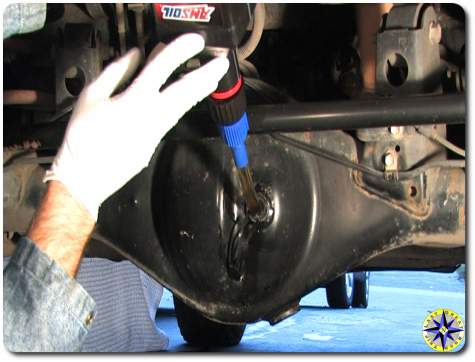
Remember that funnel with flexible tube?  Getting the oil out of the bottle and into the axle housing through that little hole can be tricky.  One of the advantages of the Hopkins FloTool 10704 Spill Saver Measu-Funnel is that the flexible tube funnel cap will screw directly on to the Amsoil quart bottles.  The cap has an open and close position preventing spills as you position the bottle and hose into place.

Squeezing out three plus quarts of thick 90 weight through the tube and into the axle housing will take awhile so get comfortable.  It works best if you give the quart bottle a few long squeezes and than allow air to flow back into the bottle followed by a few more good squeezes.toyota fj cruiser rear differential fluid level
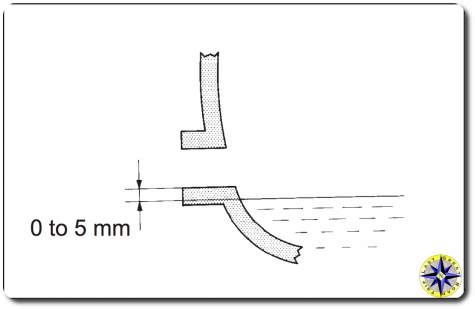
Checking the fill level on flat ground is easy.  The oil should barely begin to run out or just about to run out (within 5mm of the fill opening).

Hand tighten the fill plug and new gasket followed by torquing down the plug to Toyota specifications (36 ft.*lbf for the 2007 FJ Cruiser).

Give everything one more wipe down and check for leaks followed by a drive around the block.  Double check for drips and leaks when the test drive is complete.

There comes a time in every rig’s life when it’s gear oil needs a change to keep all the gears turning smoothly.  Changing the rear differential oil on a Toyota FJ Cruiser is a simple maintenance job anyone can do with a little know how and about 60 minutes.

Be sure to change the gear oil in the transfer case as well. Learn how with our step by step transfer case oil change video.

woman tattoo artist at work

The Continuing Adventures Of Hula Betty

hula betty looking outYes, every woman in this website is referred to as Hula Betty…  She is an independent spirit.  A woman who knows what she wants and has the drive to reach out and take it.  Hula Betty is a way of life that embraces adventure.  More than a name, more than a pretty face, Hula Betty is a way of life and a sense of self.  Which brings us to this adventure.

Leaving your parents’ home and going out on your own is the ultimate adventure.  Its the big adventure every parent looks forward to watching with pride and dreads with all their heart.  You hope that when they leave, they take with them the knowledge you’ve tried to impart, a strong identity of who they are and a compass in their soul that will always guide them home if needed.seattle street

Hula Betty has that and more.  And she wanted to make sure she never forgets her roots.  Her idea was to combine flesh and ink to create a permanent reminder of all those temporary feelings of her youth.

We set out for the city on a day painted with sunshine as the ferry boat pulled out into the sound.  Leaving the sleepy little poulsbo behind, the Seattle skyline grew closer as we talked about things to come and what led Hula Betty to her decision.  Two adults discussing life.map rack

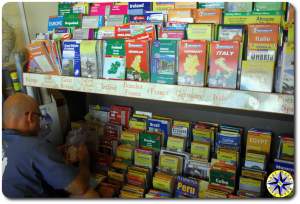
One thing about the ferry schedule…  you are either an hour early…  or hour late…  the boat never seems to line up with the time you planed.  But an early arrival gave us time to walk around, taking in the sites and the smells of Pikes Place.  We stopped to enjoy a little people watching from the calm of a barista’s paradise, and even managed to explore the world from the pages of a map as we chatted about the places that remained to be explored.  Today’s destination was a little closer…  but no less exotic.

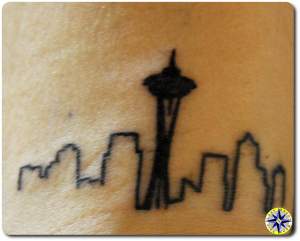
seattle sky line tattooMadam Lazong’s was where I first had my adventures etched into flesh and I was proud to be asked to accompany Hula Betty as she marked her adventure.  She had spent considerable time contemplating designs, placement, and the emotions this marking would evoke for her.  She was ready but Steph was running late and you could tell Hula Betty was getting a little nervous as the realities of the needles sunk in.  But she is nothing, if not strong in her convictions, she knew the butterflies would pass.

Some times its the little things that have the most meaning in our lives.  For me it as a day spent with Hula Betty.  For her it was the elegant simplicity of the Seattle skyline to reminder of home.

swr meter CB radio test setup

Can You Hear Me Now…

cb antenna quick release spring baseCommunication when off-road is key to safety and fun.

The most popular method of trail communications has to be the CB radio. Available at almost every discount department store, a CB radio setup provides good vehicle to vehicle coverage while on the trail.  On outings with many off-road clubs, a CB is mandatory if you plan to participate in a club-sponsored ride.

If you ask Hula Betty, she will tell you there is one universal truth about me…  No matter what, and I really mean it, no matter what, I will forget one thing when I go on an off-road adventure.  And for a while the one thing was a CB antenna which meant I would have to stop along the way and pick one up.  On the good side this has given me a nice collection of CB antennas and an opportunity to try them all out.

The line up includes:

CB radio antennas have two functions…

  1. Capture radio frequency waves and convert them into electrical signals
  2. Radiate out radio-frequency signals, which is done best when the length of the antenna precisely matches the wavelength of the transmitted radio frequency (1 – 40)

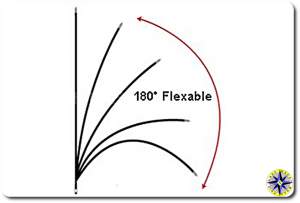
CB antenna flexIf they all do essentially the same thing is there a difference in CB antennas you ask. CB antennas come in various sizes, flexibility and with different methods of fine tuning their efficiency.

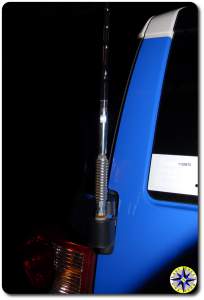
A CB radio can broadcast for miles but it is based on line of site.  For this reason we use a four foot antenna which mounted on our rear door hinge stands above the roof and any stuff packed in the roof rack giving it a clear view of the horizon in every direction.

SWR (standing wave ratio), is a measurement of how efficiently your antenna system will radiate the power available from your radio. In simple terms, your radio would like to radiate all of its power, but can only do so if the other components cooperate. Bad coax and mounts, inefficient ground plane or poorly tuned antenna can cause system backups.  CB antennas need to be tuned to be as efficient as possible and by setting your antenna’s SWR you reduce the restriction of radiated power. The easiest way to understand the concept is to think of it in terms of water flow. That is, if you put a nozzle on the end of a fire hose, your potential output will be restricted by the outlet and water pressure backs up into the pump. Tuning your antenna opens the nozzle to full.  Poorly tuned antennas restrict the flow of the output frequency and can cause damage by backing up all that power into the CB radio.firestik designer CB antenna

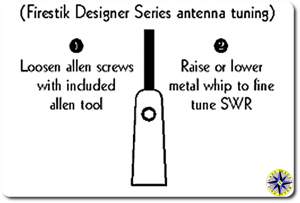
If all radios only transmitted on one channel, it would be a much easier task to design antennas. As it is, there are 40 CB channels to contend with.  CB antennas can only be made to resonate at one specific frequency (channel). The goal of the antenna manufacturers is to build the antenna to resonate at a frequency in the middle of the band (channel 19) and make it broad- banded enough to keep the other frequency’s related SWR at the two extreme ends (channel 1 and Channel 40)  of the band below 2.0:1.  Since each radio system is unique, the final tuning is left to you.  How you go about fine tuning your antenna varies slightly.

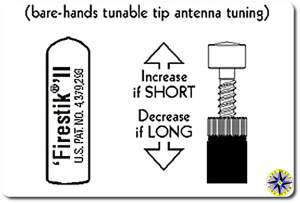
firestik II cb antenna tuningThe three models of antenna we now have, are all four feet long with adjustable tips.  Because the antennas stick up high, they run into low branches, overhangs and ferry boat cross beams.  The Wilson flex-4 is designed to bend when it encounters solid objects.  In fact it can double back without cracking or breaking.  The K40 and Firestik requires a spring base that allows the antenna to fold back instead of splintering the fiberglass.  When properly adjusted they all broadcast and receive radio signals well. But here is where they seem to differ the most to us.  The K40 requires a small allen to make adjustments.  The Flex-4 requires a small screw driver for adjustments.  The Firestik uses a turn screw that can be adjusted by hand.  Once you have your antenna dialed in for your CB radio you should not have to worry about it again.

So how do you fine tune you’re CB antenna?  You need a SWR meter, which you can pick up from Radio Shack.  You may want to check with your local 4×4 club to see if anyone there has a SWR meter you can borrow.

You need to understand two basic points before adjusting the length of your antenna (fine tuning it):

  • If the SWR on channel 40 is higher than that on channel 1, your antenna is too long.
  • If the SWR on channel 1 is higher than that on channel 40, your antenna is too short.

Start by finding a suitable location to park your rig. There should be no obstructions, such as trees or buildings, within 10-15 meters of your antenna.  Make sure that you’re inside the rig with the doors and windows closed to ensure an accurate reading.  It is important to have your antenna properly grounded to your rig or it may not operate at all.

IN GENERAL HERE IS HOW YOU FINE TUNE YOUR ANTENNA (follow the directions for your specific SWR meter).

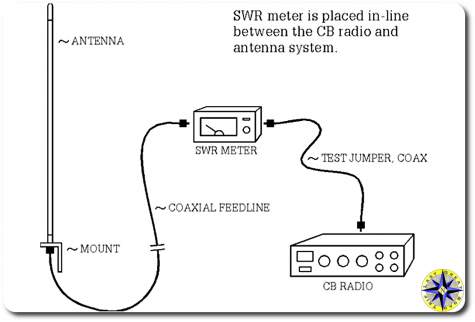
Hook up the SWR meter. Disconnect the coaxial cable from the back of the radio. Reconnect this end of the cable, which leads back to the antenna, to the SWR meter in the slot marked “antenna” or something like that.   Use the jumper lead and connect your radio and the SWR meter through the connection marked “transmitter”or something like that.  You are placing the meter between the CB and the antenna.

  1. You will initially calibrate the meter for your system. Set the switch on the SWR meter to “CAL.”
  2. Turn the radio the Channel 1 (40 on the second pass).
  3. Key the microphone (depress the button and hold it) but do not speak into the microphone.
  4. Turn the knob on the SWR meter labeled “CALABRATION” until the needle reaches the setting position at the end of its range.
  5. Release the transmit key.
  6. Set the function switch to “SWR”.
  7. Key the microphone again without speaking into the microphone.
  8. Quickly record the reading on your SWR meter and release the transmit key on your microphone.

You are now going to repeat this process for channel 40.

Depending on your readings, lengthen or shorten the antenna appropriately and repeat your tests.  Make small adjustments as you work to optimize your antenna and remember:

  • If the SWR on channel 40 is higher than that on channel 1, your antenna is too long.
  • If the SWR on channel 1 is higher than that on channel 40, your antenna is too short.

The objective behind tuning your antenna is to make these two readings identical or as close as possible. Getting down to a ratio between 1.5:1 and 2.0:1 will produce an excellent broadcast signal that will not harm your CB radio and broadcast clearly across all 40 CB channels.

If you only communicate on one or two adjacent channels anywhere within the band, you can tune your antenna to achieve optimum performance on those channels.  However, most people prefer to use the entire bandwidth when tuning.

This procedure can sound a little cumbersome, but fine tuning your rig’s CB antenna only takes a few minutes and is vital in protecting your CB Radio and optimizing its performance .  Each antenna manufacture claims they have power output improvements and other performance enhancements that set them apart.  We found them all to operate the same on the trail when tuned correctly.  Of course it could be our set up and this is not a scientific test by any means.  Can you hear me now.