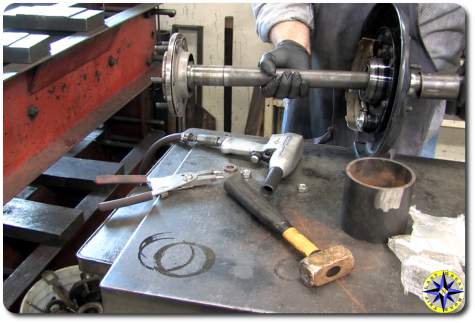
 It started out as oil appearing on the inside of rear wheel. Hum, that can’t be good. Ok, a blown oil seal, that is easy enough and just a couple of bucks for a new seal. After changing the seal out it was much better, but not perfect and in a few days it was clear something wasn’t exactly right. Did I screw up the seal when I put it in? Is the breather clogged and building up pressure that blows the seal? God I hope it’s not the bearing.
After checking the breather to ensure good air flow and changing the seal one more time for good measure, it was clear we’d need a little professional help and turned to our friends at Auburn Car Repair & Offroad to replace the wheel bearing.
In order to change the rear wheel bearing, you need to pull the axle, apply 20+ tons of pressure to separate the bearing from the axle and than push the new bearing on. But aside from machinist magic of replacing the bearing, most folks can perform a majority of the work involved.
After getting the axle in the air and removing the wheel, start by unplugging the the ABS sensor wire. Remove the bolts that hold the disk brakes housing and carefully set it aside. Tip: if you cut the top of the clip holding the brake hose in place you can slide the hose out without disconnecting it from the hardline and avoid having to bleed the brakes later.
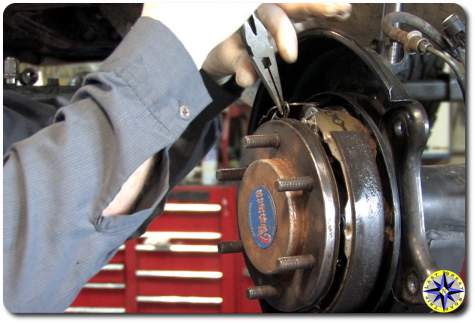 Pulling the brake disk (rotor) may take a few soft raps with a plastic mallet to loosen rust’s grip in order to slide if off. With the disk removed the parking brake is exposed. There are springs top and bottom that hold everything together. The top springs are under a good deal to tension and will require work to lift them off of the stud. Once the springs are released, the shoe hold down springs can be removed along with the brake shoes and other parts. The best advice here, slow down, take your time and ensure you keep track of all the parts.
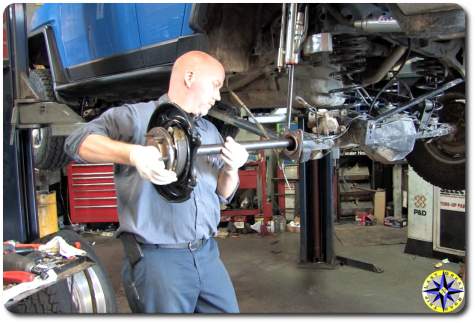 The parking brake cable needs to be removed before the #1 shoe can be completely removed.
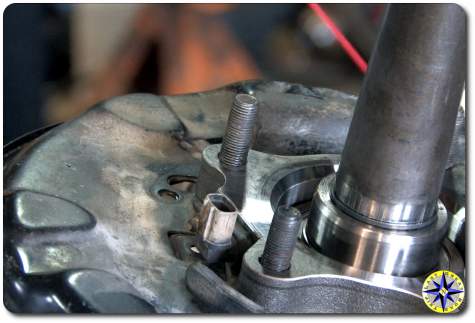
Remove are four nuts holding the axle (the wheel bearing housing actually) to the axle housing. Grab a shop rag and slide the axle straight out from the housing.
Remove the axle seal and drape a shop towel over the opening to keep the dust out. If you’re simply replacing a blown seal, you can jump to the re-install.
 The ABS sensor is attached to the wheel bearing housing. A small bolt holds it in place and needs to be removed before you proceed.
This is where the magic happens. If you don’t have a 40 ton hydraulic press in your garage you’re going to need to head down to a machine shop / auto shop for a little love. The machinist will remove the retaining clip, set up the axle in their hydraulic press, and pull the wheel bearing housing off of the axle. She will then set up the new wheel bearing housing so it can be pushed into place on the axle and replace the retaining clip. Done.
When you get the axle back, be sure to reinstall your ABS senor. Add a little grease to the outside of your new axle seal and tap it into place. This is also the time to replace the O-ring.
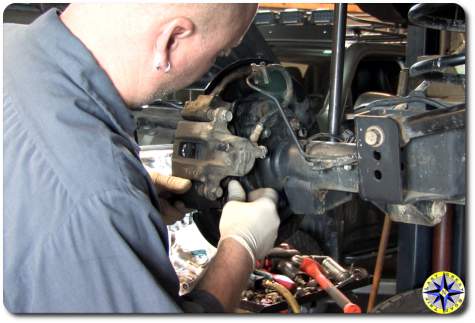 Carefully slide the axle into the housing. Avoid banging against the seal. You may need to turn the axle a little in order for the splines to line up and fully slide into the housing. Tighten up the nuts that hold the axle to the housing.
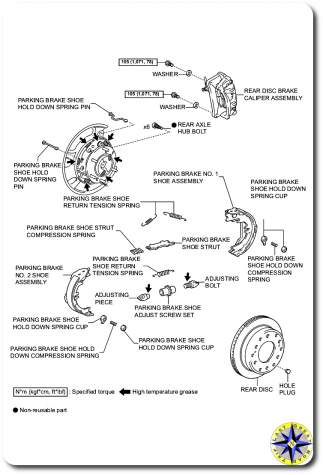
The tricky part for me was reassembling the parking brakes. Although the guys at Auburn Care Repair & Offroad completed it in a few minutes, it took me about 30 minutes to get the parking brake shoes back in place when I replaced the seal the first and second time. Install the #1 shoe first, reattach the parking brake cable, then install the #2 shoe. It is not all that complicated but there is limited room to work the parts into place and the springs take a little muscle so take your time and use the diagrams here to help.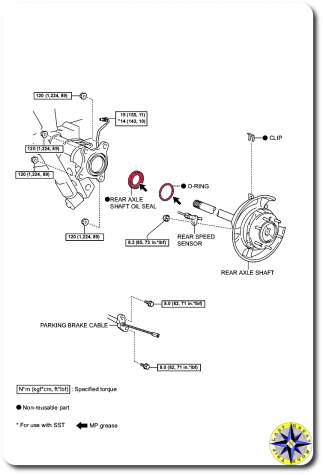
After the parking brake shoes and brake cable are complete it is time to adjust the shoes so they will hold tight when the parking brake is engaged. Make small adjustments, put the brake disk in place and feel the rotation against the shoes. Once you feel the shoe begin to rub, back it off a bit so the disk rotates freely but quickly grabs the drum when the parking brake is engaged.
Put your disk brake housing back on (if you disconnected the break hardline you’ll need to bleed the brakes). Connect the ABS cable to the ABS sensor. Mount your wheel and your set.
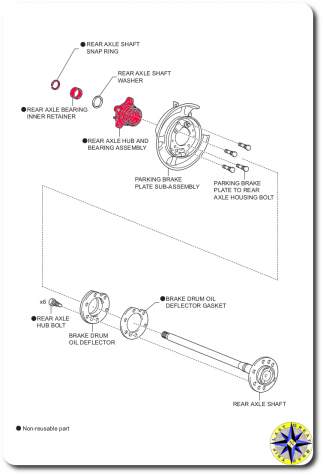 No so hard right. If you want to do this work yourself you’ll need a few parts:
- Rear Axle Hub and Bearing Assembly
- Rear Axle Bearing Inner Retainer
- Rear Axle Shaft Snap Ring
- Rear Axle Shaft Oil Seal
- O-Ring
Although you may not be able to perform all the work, you can certainly perform a good portion of the work and let a machine shop do the heavy lifting on your rear wheel bearing replacement.
Bonus: Here are the instructions Toyota has for removing and installing a rear axle on a Toyota FJ Cruiser:

Hello, I just replaced the bearings and seals on my ’07 FJC and I used your video as a guide. Thank you.
I also found why the seals will likely leak again and posted a thread on the fjcruiserforum. Its a simple fix. You can post this in the comments if you like it.
http://www.fjcruiserforums.com/forums/transmissions-transfer-cases-traction-aids/687890-rear-axle-leak-bearing-replacement.html
Glad the video helped… and thanks for the note
Is this femoval and install same for 4th gen 4runnerd? Thanks
It should be the same procedure for the 4runner 4th gen, as well as GX470, and Prado 120.
Yes, the 4th Gen 4runner has the same setup
Hi what brand bearings did you go with?
OEM bearing from Toyota dealer. The first one lasted 120K highway and hard off road miles making it a good choice for me.
OEM is always better, but the most expensive. Rockauto sells NSK a Japanese bearing with a good reputation for $58. Makes it affordable to do both sides at the same time.