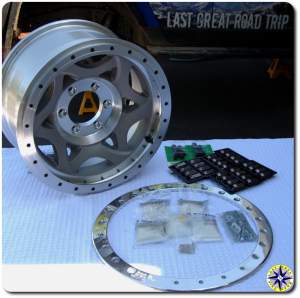
 Yup, I’m talking beadlock wheels. IHRA Pro Stock cars, CORR trophy trucks and vertical wall scaling rock crawlers all use them. But how exactly do they work and what does it take to install them.
When an IHRA Pro Stock car travels down the quarter-mile in under eight seconds or an off-road truck airs down real low certain physics take over causing a tire to loose its grip on the wheel often resulting in the tire falling right off the rim. Beadlocks over come this physics problem with a separate ring bolted to the wheel, holding the tire tightly in place. Air pressure is replaced by bolt torque to hold the wheel on tight… in less than ideal conditions.
When it comes to beadlock wheels you’ll need to choose a manufactured wheel or cut up a steel wheel and build your own. For our rig we decided to go with Walker Evens 17″ beadlock wheels. Born out of desert racing, with 30 years of off-road racing experience, and more than 140 off-road racing victories we figured Walker Evens knows a thing or two about wheels. The Walker Evens beadlocks are cut from cast aluminum rated at 3,800 lbs with grade 8 bolts and holes for valve stems that have been set back out of harms way. Walker Evens beadlock wheels are cut to order and available with custom back spacing. We opted for a 3.75″ back spacing.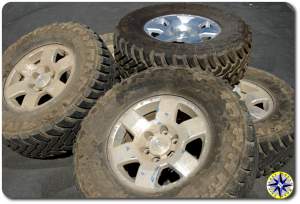
The items required to mount the tires onto our beadlocks and balance them isn’t a long list but requires a couple of inexpensive specialized tool:
- Valve stem tool
- Valve core tool
- Torque wrench
- 1/2” Socket
- 19mm and 21mm Socket (lugs)
- Ratchet strap
- Air source
- Rubber mallet
- Valve Stems (.453 rim hole, 1 ¼” long)
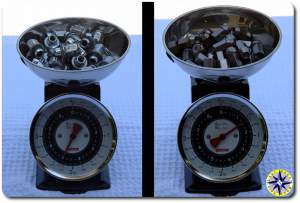
- 8 ounces per tire of Dyna Beads in easy open bag (how to balance off-road tires with Dyna Beads)
- Valve core w/ filter (keeps Dyna Beads out of the valve stem)
- New lug nuts
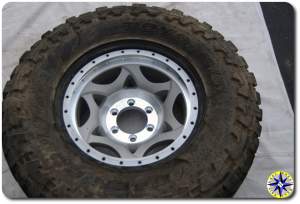
This mod is about as hard as changing a tire on the difficult scale but it is time consuming. Plan for about one hour per tire, bring a stool.
- In our case step one… get the tires off the old stock rims. You pull the valve stem core to empty the tire and use a hi-lift to push the tire off the wheel. We punked out and took them down to Les Schwab, paid the $4 per tire and called it good. After all this is how to mount tires on beadlocks, not how to take tires off a stock rim.
- Grab one of the new valve stems and using the valve core tool, remove the core than insert the new core fitted with the filter. This step ensures the beads we will use to balance the tire don’t clump up in the valve stem. The core simply screws in and out.
- Insert the valve stem through the wheel and using the valve stem tool, pull the valve stem through until it seats in the wheel.
- Place your wheel flat on the ground and work the tire’s inner bead over the wheel. Sounds simple enough doesn’t it. This involves setting one side of the tire’s bead over the lip and than hurling yourself through the air and landing on the tire forcing the remainder of the tire over the wheel’s lip… This may take a couple of times… and it isn’t pretty.
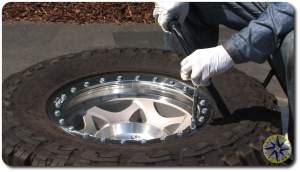
- Now that tire is on the wheel, open the bag of Dyna Beads and place the beads, bag and all, inside the tire… that is all there is too it.
- Stop! Are you sure the valve stem is inserted? Are the Dyna Beads in side? You really don’t want to find you forgot to insert them after you’ve bolted up the ring… It could happen.
- Take your rubber mallet and knock the outer tire bead onto the lip the wheel so it sits on the wheel snugly and the locker ring will fit on top.
- Place the locker ring on the wheel and hand tighten all 24 the bolts. Use a crisscross pattern and ensure you don’t cross thread any of the bolts.
- Grab your torque wrench and start tightening the bolts in a circular pattern. Walker Evens recommends first torquing the bolts to 10 ft/lbs than 15 ft/lbs and finally 18-20 ft/lbs. Get comfortable this is going to take awhile. My advice here is to really chase the bolts around at the 10 ft/lbs setting until they all are torqued… It will take going round and round and round… and around but the work here pays off on the next two setting which will torque up much more quickly. No matter how you do this, it is going to take time… I’ve had dates that took less time than it took to get all 24 bolts torqued up correctly.
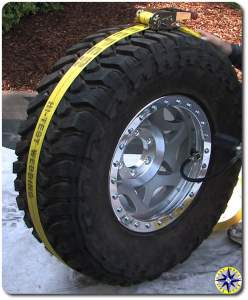
- Ever wonder how to re-inflate a tire if you roll a bead on the trail? Well here is your chance to practice. Take a ratchet strap, wrap it around the tire and tighten it down. You will have a large gap between the back of the wheel and the tire bead but the tire should be pressing down against the wheel. Using your air source begin to air up the tire normally. Caution! Unless you have a crush on a doctor or nurse at the emergency room and want a reason to visit them, keep your fingers out of that gap between the tire and
 wheel. As you inflate the tire, it will slide out closing the gap between the wheel and tire. You will get a loud pop when the tire bead finally seats itself on the wheel. When tire does seat itself, stop inflating, remove the ratchet strap and finish airing up to the tire manufactures recommended setting.
 - Rinse and repeat for the rest of the wheels.
When you select your wheels, check which type of lug nut is required. Our stock FJC wheels used a flat mag style lug nut and bushing. The Walker Evens require a cone style lug nut… of course. We opted for the titanium colored aluminum 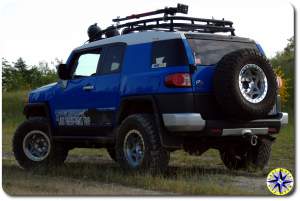 racing lug nuts from Gorilla Automotive. They are strong, super light and high on cool factor.
With the tires mounted and balances, it was simply a matter getting them onto the rig. Since you have the torque wrench out be sure to use it… According to the Toyota manual, lug nut should be torqued to 85 ft/lbs.
After care:
- After 25 miles, re-torque all your lug nuts
- Walker Evens says to re-torque the beadlock ring bolts every other week for the next six months. No one said cool was maintenance free.
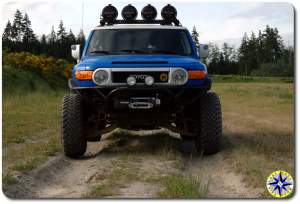
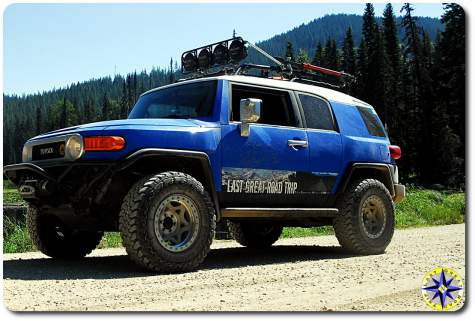
With the extra back spacing and our 2″ long travel kit our rig’s front stance is now 82″ wide… great for stable speed, bomb down desert roads and play in the off camber stuff… not so much for squeezing through gate keeps. Every thing is a trade off…

A great write up. Very informative. Thanks.
Thanks Paul for another great video. Will def come in handy when we get our WE beadlocks.
Rueben… glad you like it… but where will you find a fat man in coveralls to jump on the tire.
That’s sweet! Thanks for the tips
I have a question. I know the wheels are 17′ but what is the width of them? I’m curious also if you know if I ran that tire size if I would need to do any chopping to get them to fit. I will be running at 3′ toytec lift.
the width of the wheels is 8.5″ The tires we ran in that video are 295x17x70. 285x17x70 (33″) or larger will require a body mount chop to avoid rubbing at full turn. Depending on the width of your tires you may see some rubbing (polishing) on your stock upper control arms (UCA). You can go to an aftermarket UCA such as total chaos to give more clearance if you need.