All posts by Last Great Road Trip (LGRT)

yellow sun fusion fj cruiser rock crawling

The Press Can’t Stop Complementing The FJC

Seems like this year which is probably its last, Toyota’s FJ Cruiser has received more press than ever before. Take for example “FJ Cruiser does its off-road namesake proud, Toyota’s rock-crawling mud eater is the real deal in an era of phonies” on the Edmonton Journal site.

Like most of the reviews, it talks about the more than capable off-road qualities of the Toyota FJ Cruiser, ranks it at the top above Jeep, Hummer or Land Rover (some combination of price, quality, and capability), and informs you that the seats are little uncomfortable (I don’t get that one), the nobs are big (I like Fisher Price sized toys) and of course the now legendary blind spots.  But they also let you know that all great rigs of the past have had their quarks.

With the phasing out of the FJ Cruiser at the end of 2014 there remains hundreds of thousands out there and like their older brothers, these will be handed down, sold, traded and reincarnated by thousands more new off-road enthusiast  for decades to come.

My prediction from back in the day seems to have been pretty close…

Look for a big hand off with many of the 4×4 technologies and styling ques showing up on the Toyota 4Runner.  I believe the FJ Cruiser allowed Toyota to test a number of engineering and styling ideas as well as 4×4 goodies in a smaller package that are now ready to land on the Toyota 4Runner, their more mainstream vehicle.  But that is just my prediction… 

To bad I couldn’t have found a line on it in Vegas?

fj cruiser rear lower control arm install

How To Install Rear Lower Control Arms

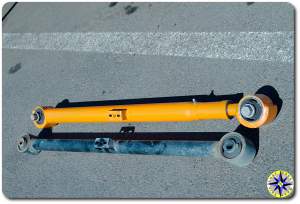
Metal Tech fj cruiser lower control arm stock fj cruiser lower control armSooner or later anyone who spends a little time enjoying off-road adventures will hear a story from someone they know who bent their rear lower control arm (LCA).  On FJ Cruisers the stock rear LCAs are not the strongest in the world and the first time they get dragged over a rock or log, they’ll fold like origami.

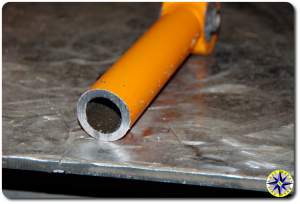
The fix for this weak link is to swap out the stock rear LCAs for a set Metal Tech 4×4 LCAs made out of D.O.M. tubing, aka high-strength seamless carbon steel.  And as you would expect from the guys who defined protection, Metal Tech has engineer a pair specifically for those who wheel their FJC.  Besides strength, Metal Tech added length adjustments to their rear LCAs to ensure proper geometry is maintained for rigs with different lift setups.  In fact last time we were at Metal Tech, we asked Mark to show us how they build their rear LCA.metal tech fj cruiser rear lower control arm cut away

  1. separate the heads of the Stock LCA from the body
  2. liberate the bushing by squeezing it out.  Less pain the childbirth but just about as much noise
  3. demonstrate unequaled TIG welding skills, assembling all the parts including tubing body, threaded adjustable section and heads
  4. press down the bushings and thread a grease nipple into place

There is always a big confidence booster in a product when the manufacturer is proud to show off exactly how their product was designed and the process for creating a part they put their name behind.  And after seeing how Metal Tech engineered and builds their LCAs, there was no questions about which ones were going on our rig.

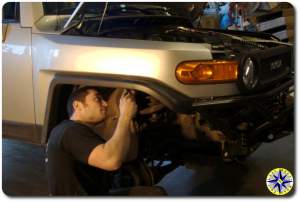
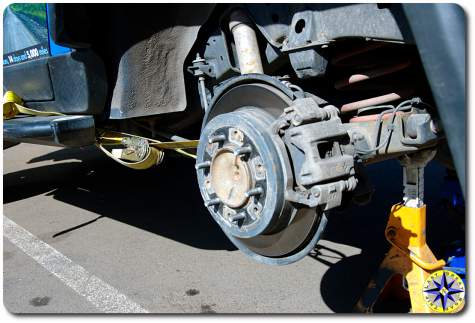
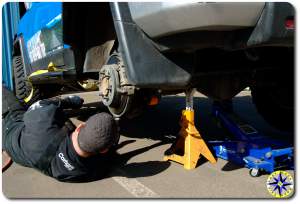
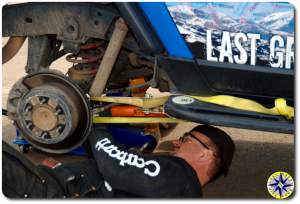
Flip the calendar forward a few months and we were back at the shop getting our own pair of rear LCAs. Arriving at Metal Tech, Mark wasted no time putting our rig up on jack stands and pulling the rear wheel.  The procedure is very straight forward, remove the bolt, holding the emergency break line to the LCA and than the bolts that hold the LCA to the rig, one at each end.  One of the tricks Mark showed us that the Toyota rear lower control are installation instructions omits is that by placing a strap around the axle to hold it in place will keep everything still making both LCA removal and re-installation a simple procedure.  When attaching the strap around the axle take care to clear the brake lines and ABS sensor cable.

Metal Tech LCAs are fully adjustable.  Once you have the stock LCA removed, match it up to the new one and adjust the head until they are the length you want.  Once you have the length dialed in for the specific geometry of your rig match up the second LCA so they are the same.installing fj cruiser rear lower control arm

Bolting the new LCA in place is a simple matter of sliding the front head its mount and slide the retaining bolt through to hold it in place followed by doing the same on the other end.  When mounting up Metal Tech LCAs remember the adjustable head attaches in the rear with the grease nipple point up out of the way.  Slide the washers over the bolts front and rear and tighten up the nuts.  You will want to torque the bolts down to the proper setting.  Toyota calls for 96 ft/lbs.  A little hint here:  Fix the nut with a box wrench while turning the bolt head with the torque wrench.

After you have the LCA bolted up and removed your strap, replace the bracket holding the emergency brake line and bolt it into place.  Replace the tire and head over to the other side to rinse and repeat.  That is all there is to it.installing lower control arm toyota fj cruiser

Once both LCAs are replaced and the rig is back on the ground, take it for a spin around the block and than torque down the bolts once more to ensure proper hold.

With the new rear LCAs we can rest a little easier if we have to drag the rear end over an obstacle on the off-road trail without worry that a bent LCA will put an end to our run or worse cause us to hike out for help.

Update: Metal Tech 4×4 has released their second generation lower control arms for the FJ Cruiser and Toyota 4Runner.  The new control arms have the added benefit of being offset that prevents binding and improves it’s ability to slid over obstacles.

2007 toyota fj cruiser dirt

Show Your Support

thank youA friend asked if she could add the Last Great Road Trip banner to her forum signature.  I didn’t know anyone would want to, but how could you deny a request like that.  So on the off…  way off… chance anyone would like to jazz up their email or forum signature here you go.

Every email client and forum software is a little different but they will generally let you upload a file and place a link on it.  Copy any of the images below to your desktop by left clicking the mouse and saving the image to your desktop and than load it into your signature following the forum or email instructions.  To add a link back to the Last Great Road Trip blog add the following URL link:  http://www.lastgreatroadtrip.com

Desert Sunset Last Great Road Trip Banner

banner sunset

Back Roads Last Great Road Trip Banner

banner backroads

Original Last Great Road Trip Banner

banner original

Thank you in advance to anyone who adds one of these images to their signature.  Really Thanks! We appreciate the support.

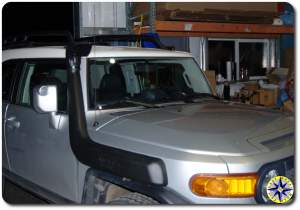
black fj cruiser with snorkle

The Return of Scuba Steve

fj cruiser arb snorkelWhen we last left our off-road adventure hero, Scuba Steve had just saved the orphans from the waters of the 100 year flood and was riding off into the sunset to wheel another day.   Scuba Steve’s rig had barely dried off when a cry for help came over the CB.  Dastard Dobbs, Scuba Steve’s arch enemy, had kidnapped the Swedish bikini full-contact origami team and was holding them for ransom at his hideout deep in the middle of nowhere.  Without regard for himself or his rig,  Scuba Steve wheeled through the engine clogging desert dirt and crossed the chest-high torrent waters of Goober river which surrounded  the island hideout like a mid-evil castle moat.  Like all evil doers, Dastard had underestimated the power of the snorkel modded scuba rig and had flown off leaving the girls unguarded.  As Scuba Steve forged the waters and rolled up to the hideout, the front door flew open and the girls ran out, bouncing and bounding into the rig.  With the entire team, including its goalie, on board, Scuba Steve and the girls headed off  to the ESPN World Cup Beach Full-Contact Origami Bowl… But that is another story.

Snorkels are designed to allow the engine to draw fresh, clean, dry air from the rigs roof line.  In desert convoys the higher intake point of snorkels has been shown to deliver cleaner air to the rig’s engine reducing the strain on the filter.  And when it comes to water crossings…  well it works just like a snorkel, keeping the water out and the air flowing in.  Friends of ours, Ruben and Becky let us know they Snorkel Kitwere heading up to Metal Tech and having a Safari Snorkel from ARB installed on their rig.  So why not run down there and show everyone what it takes to add a snorkel to your FJC.  (some pictures courtesy Safari Automotive Technologies Pty. Ltd.)
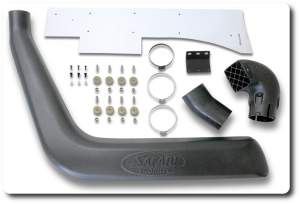
The snorkel kit comes complete with all the hardware needed to connect it to your rig’s air intake system but you will need a few tools including:

  • Loctite® for the studs that you will insert into the snorkel body
  • 105 mm hole saw
  • 16 mm step-up drill bit
  • painters tape (blue or green)removing fj cruiser fendor apron
  • screwdriver, hacksaw, drill, grinder (or sander),  8mm & 6 mm wrenches
  • permanent marker or grease pen
  • body colored touch up paint
  • silicon sealant (optional)

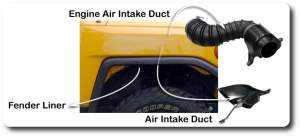
You need to remove the plastic apron under the wheel well exposing the inside of the fender.  This involves popping out the little plastic fasteners that hold the liner in place.  It helps in spotting all the snaps if you hose out the wheel well fist to wash off the dirt and gunk.  With the fender  liner pulled out, remove the air intake duct located inside the fender well.  step1This is also the time to remove the intake duct located inside the engine compartment that connects to the engine’s air filter cover.
 

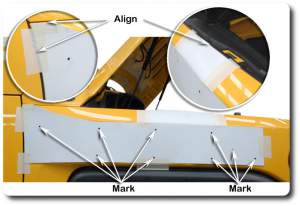
Thstep 2e kit comes with a template that will layout all the points where you will be poking holes in your rig.  There are eight (8) 16mm holes and one 105 mm hole. Getting the alignment correct is straightforward.  The template meets up with the rear edge of the fender and the tab come up to the top fender edge.  Use the painter’s tape to secure the template than mark the points with your pen and remove the template.
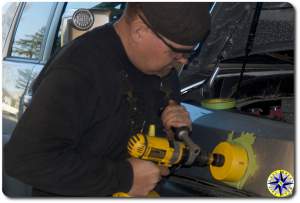
Drilling hole in fj cruiser for snorkleOk this is where we separate the men from the boys.  There is no turning back on this mod once you start the drilling.  Take a big breath relax and go easy.

Start by using a small bit to drill pilot holes on all the marks.  This will keep the larger drill bits from sliding off across the fender.  With the pilot holes in place take some painter’s tape and cover the areas that will be drilled out extending past the final hole size.   Be sure to leave the pilot hole visible.  The tape will keep any metal slivers caught on the drill bit from spinning around and scratching the fender on the hole’s edge.  If your step-up bit goes beyond 16 mm, run a piece of tape on the bit where you want to stop.
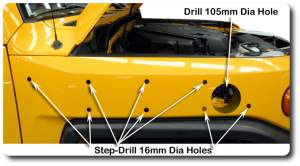
step3That wasn’t so bad…  kind of like ripping a band aid off, it only hurts for a minute. At this point you can remove all the tape and appreciate you work.  De-burr the holes and give a quick swab of body paint to keep the rust off.

Now that you’ve recovered from the trauma of attaching arb snorkel boltscutting a perfectly good fender, its time to install the eight studs into the snorkel body.  Apply a little Loctite® to the stud threads and screw them in.  Once you’ve hand tightened the studs, grab a couple of 8mm nuts to double and tighten the studs in.  A couple of DO NOTS.
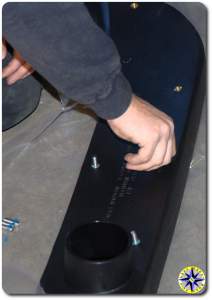
  • Do not use the the nuts that came with the kit to tighten the studs since they have nylon bushings and are designed to be used only once
  • Do not over tighten the studs.  Remember the snorkel body is plastic and you don’t want to strip out the threads

At this point you will also step 5want attach the upper mounting bracket to the snorkel body neck.  Add a dab of Loctite® here as well.
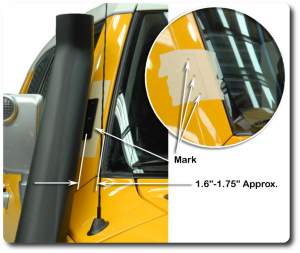
Grab the tape again and cover the upper A pillar cover where the upper mounting bracket will be attached to the rig.  In order to determine where these holes will be drilled, dry fit the snorkel body on the rig holding snug to the body and A pillar cover. Mark the tape with the pen and pull the snorkel back out.  Drill the three holes which will hold the plastic inserts.  Start again by tapping the hole, followed by the step up bit to 8 mm.  De-burr and swab with a little body touch up paint.
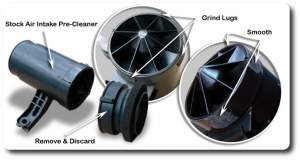
step 7aDepending on the type of air intake you have, the procedure changes a little here.  Later models have a pre-filter which acts like a centrifuge spinning the air which throws the dirt to the side and down the one-way rubber debris cup.  To ready this style of pre-filter, remove the front cap and grind down the plastic lugs that hold the front of the step 7 old style pre-filterpre-cleaner in place.
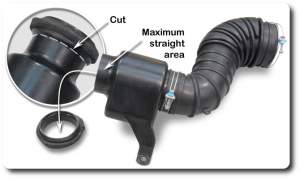
The older style pre-filter is one piece unit.  Grab the hacksaw and cut the collar off just behind the point at which the foam rubber gasket is attached.  When the cut is complete, be sure to wipe out the interior and remove any of the plastic sawdust.
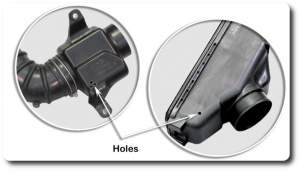
step 8This is also the time to decide if you want to seal the drain holes using a little silicon.  Sealing the drain holes will prevent water from getting in, but also means it can’t get out if some finds it way down the snorkel during a monsoonal down pour.  You can rotate your air ram to face backwards when driving in the big rain to prevent water from entering the air ram.  There is a single drain hole in the air filter cover and on the older style pre-filter you will find three drain holes on the bottom.
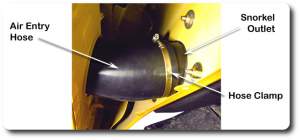
step9Lets bolt it all in place.  Attach the rubber boot to the snorkel intake collar.  Bring the snorkel up to the rig and using the washers and 8mm nylon lock nuts, attach the snorkel body to the fender.  Attach the upper mounting bracket to the A pillar cover using the three screw included with the kit.  Tighten the 90/100 stainless steel hose clamp over the hose and collar holding it in place against the snorkel body.step11

Hang in there, you’re almost home!  Using the other stainless steel hose clamp (80/100) attach the modified pre-filter to the hose that connects the snorkel to your air intake.  re-attach the pre-filter to the rig and the air filter cover.  Wow that part was easy.
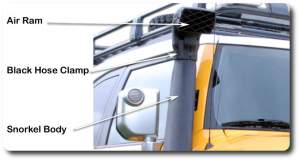
step 13Lastly, attach the air ram assembly to the snorkel body using the black hose clamp to hold it all in place.  Use a socket to tighten the hose clamp instead of a screw driver, this will lesson the paint scratch on the black clamp.  A little black rattle can will touch up any scratches on the clamp.

Your engine is now safe from gulping water when crossing rivers or playing in the mud.  Don’t forget to protect your rear diff and e-locker, relocating their breather by performing the original scuba mod.  When it’s all done your rig is ready to join Scuba Steve on his next adventure, keeping the world safe for orphans and the world of Beach Bikini Full-Contact Origami.

florence sand dunes

Day 2 Tonight We Bowl

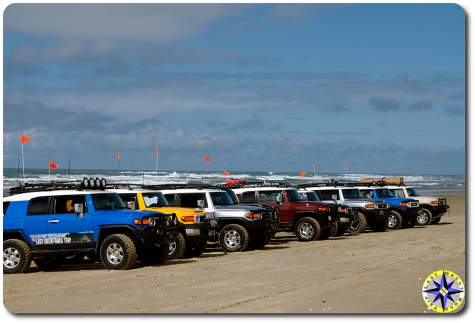
fj cruiser ocean beachThe last off-road drive on the dunes was scheduled to go into the wee hours running a jeep trail known as 430 route from Horsfall up to Spinreel.  One of the coolest sights is a long line of FJCs driving down the road like pretty maids all in a row.  The trail for Horsfall is south of where we were all staying just off highway 101.  Driving to the trail took us through 35 miles of twisty highway dotted with sleepy little one beach towns.  Each town brought the speed down to 35 mph and as the parade of FJCs passed, town folks would stare and point at us as if the prom queen were ridding by in the back of a caddy.
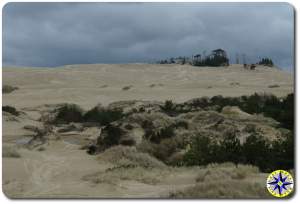
The day was sunny and bright, the night…  rainy, windy and dark.  Sitting in the staging area we contemplated the dilemma before us.  The locals told us the trail run should take 3 hours. The Forest Service web site shows the dune area open until midnight.  The signs in the staging area says, “Gates Close At 10:00 p.m.”.  The clock in the rig reads 8:15 p.m.

The map showed three exits along the trail and we decided we would pull off at the closest exit when Micky’s big hand pointed to the nine and his little hand pointed to the six (that’s 9:30 if you are doing the metric conversion).  We now had a plan and hit the trail.  Last night I lead the group with all the lights on turning the night into day.  Tonight I ran tail gunners with only the factory headlights as a courtesy to everyone ahead.  The trail is wide, carving its way north through the trees which line the dunes and contain the endless miles of sand.  With windshield wipers on we proceeded and marched in.

When you hear a trail is filled with one foot woopty doos you often picture motocross or desert race courses where rigs glide over as there suspension beats up and down maintaining the speed of a cheetah tearing through the African Savannas.  In reality what you get is a slow train of rigs pointing their nose into the air than back down into the dirt than back into the air and so on and so on like the rhythm of a defective pace maker.  After 10 minutes of watching the lights of the rigs ahead bounce off the tree tops followed by lighting up the dirt we knew why the locals said the run takes 3 hours.  It is good to run lots of different types of trails, that way you know what you like and what you don’t.  The chatter over the CB gave a resounding thumbs down to the ever present woopty doos that stretched across the trail as we all climbed and descended the gentle tree lined hills.

toyota fj cruiser sand dunesBut as the saying goes, you dance with the one who brung ya, and we were determined to make the second exit before the gates locked us in.  It didn’t help that the factory Illumination failed to provide us much depth of field in all the rain, leaving us to wonder if the woopty doos ahead were getting smaller or bigger.  You just knew there were more ahead.

As 9:30 p.m. approached, the sign for the second of the three exits appeared.  The parade of rigs veered to the right and aimed back to the tarmac in order to air up and cruise back north on 101 to Florence.  With rain now on full drenching, we drove the 35 miles north from whence we came and after 45 minutes including a short stop to see one of the few working light houses around, we were saying our good byes over the CB as the group peeled off to their camp sites.  We hoped their tents were on high ground as we contemplated a hot shower, soft bed and HBO.

Bonus Pictures

The wet night run left little room for photo opps, so we thought we would put up a truck load of off-road adventure pictures at flickr off-road adventure that we captured from the previous two day runs. Some you’ve seen, some are new.

fj cruisers ocean beach lineup

Day 2 Morning In The Dunes

safty dave fj cruiserOk, let me start by putting this out there…  While most of the club is camping out by the dunes enjoying the great outdoors, I’m ruffing it in the local Holiday Inn.  And sure I gave up the pit toilet, leaky air mattresses and wet tent for running water, hot showers and sleeping on a soft bed.  Instead of cooking over a Coleman stove I’m  dining our in restaurants.  But somehow I did manage to get get by.

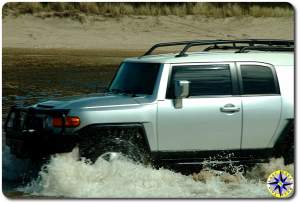
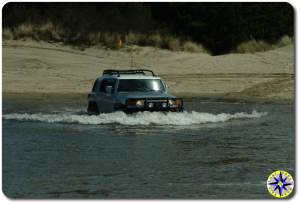
silver fj cruiser fording waterIt’s suppose to rain on the Oregon coast in spring…  Just nobody told the high pressure system that is keeping the sun shining this morning.  This morning we gathered at the Goose Pasture staging area to spend the day running the South Jetty to Siltcoos dunes area.  On the way down I had stopped at Metal Tech to say hi and before leaving, Mark boxed up some cool swag which made for some great door prizes and set a positive tone for run.

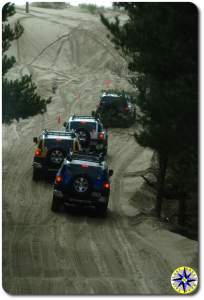
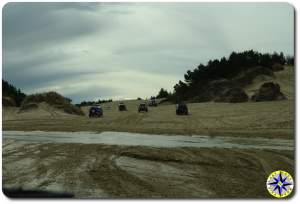
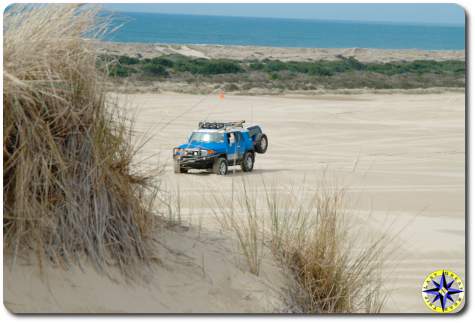
fj cruisers in a row on sand dune trailIf you have never been off-road here, the trip is a must.  There is sand stretched out as far as you can see, dotted with little quads that look like ants crawling in the sand.  We learned form last nights hill fiasco and had aired down to 15 psi before we ever hit the dunes.  Now we were riding high on the soft stuff cruising up and down the hills.

I enjoy running as the tail gunner watching everyone play ahead.  This run was no different. With Jeff in the lead we weaved our way all over the sand stopping on top of the dunes to take in the sites and ensure everyone’s’ rig was performing as expected.  And although many of the rigs are sporting a truck load of mods, the stock FJC in the group was easily keeping up…  go figure, Toyota built it pretty well from the start.

fj cruisers on florence sand dunesMy co-pilot for this off-road adventure is an old college buddy, Kevin and while not nearly as excited by wheeling as I am has made this a trip to remember.  Much of what makes wheeling fun isn’t tackling ungodly obstacles or forging raging torrents, although that certainly helps, its the chance to spend time with old friends and meet new ones.  Rolling over the dunes Kevin and I caught up on everything from kids to world politics and still had time to listen to a Jimmy Buffet tune or two.

silver fj cruiser water crossingWe had anticipated lunch would have everyone stuck in their rig keeping out of the rain.  What we experienced in a sunshiny little fresh water oasis was the comradeship of the club, chatting, sharing stories of other runs, planning new runs and telling each other how we got into this sport.  We also confirmed there were more girl friends ridding shot gun than wives…  But than again after 20 some years of marriage you learn what is a dating ritual and what is the post wedding reality…  Wouldn’t trade it for the world, Hun…  Really!

The drive over the dunes had taken us from the northern end all the way south and now we dropped down onto the beach to parallel the Pacific as we shot north to meet Brian.  Brian had taken his rig up to Metal Tech where Mark completed axle repairs on the field dressing we performed the day before.  Loosing only half a day’s run, Brain was back as some of the club swung around to head back into the dunes for a few more hours of fun in the dunes.

No one broke anything, no one got hurt and everyone had fun…  Day 2, a very good day.  Tonight we bowl!

fj cruiser sitting in sand dunes

Day 1 On The Dunes

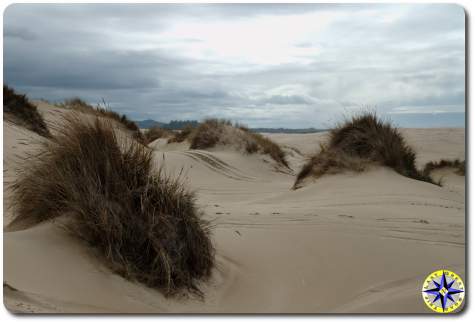
dark clouds florence sand dunesThe first run on the Florence Oregon Dunes early in the morning brought out the sun…  or at least less clouds and no rain.  After meeting up with the NWFJCC club and airing down, we headed out into the Umpqua Dune area.  This area is marked by wide open sand, along with the biggest dunes of the three OHV areas.

We zigged, we zagged, we played around, going up and down the hills, stopping to watch the other rigs.  Going over the sand we all learned the little tricks.  For instance, staying out of the tracks and driving over the virgin sand allowed you to float and keep your speed rather than chugging in the tracks of others.

Soft sand we could drive over…  how much trouble could this be.  Well let me tell you.  The sand looks flat.  Its not!  Woopty doos appear out of no where, sand that has shifted leaving a drop off where a gentle roll once was, and hills that seem to grow taller and steeper as you run up them.jacking up fj cruiser in sand dunes

It was than we heard over the CB, “We just caught air, and crashed”.  As the group regathered to make sure everyone was ok, we found driver and passenger to be fine but after a two point face plant, the rig had its A/C cooler and radiator pushed back a little, with the fender now rubbing against the door.

Some real trail carnage, but no fluids leaking and everything on the rig was still working just fine…  That could have been so much worse…  everyone counted their blessings and we where back to wheeling.

Carnage never seems to travel alone and as we gathered up on the next hill, the group discovered Karma can be a cruel mistress.  From the font of one of the rigs climbing up a small hill in soft sand came a very loud BANG.

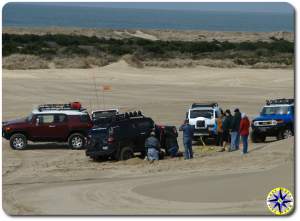
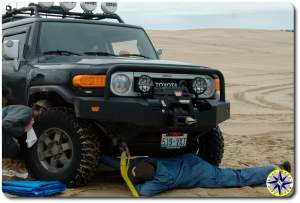
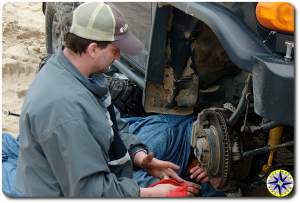
checking fj cruiser axle damageIf you ever look at an IFS and see goo leaking out of a twisted boot, you know that is not a good thing.  But just how bad it was we still needed to figure out.  Broken axles mean you’re in for a field repair.  Like Apollo 13 engineers, everyone gathered to figure out what we had to work with?

  • Spare Axel = zero, nada, none (mine won’t fit other rigs so it doesn’t count)
  • Tools = Fair amount
  • Hi-lift jack = several
  • Healthy attitudes and a willingness to pull together and help out…  everyonegreesy broken fj cruiser front half shaft

Ok…  We can work with this.  First thing, call MARK AT METAL TECH and get his advice…  Thank God for cell phones.

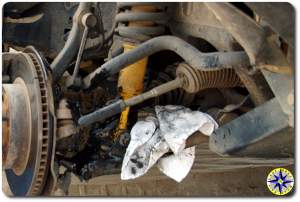
Step one was to get the wheel off the ground and pull (cut, hack, generally tear) the boot off to discover where the shaft was broken and determine how we could remove to two pieces.  With the hi-lift, we easily got the rig up in the air.  A couple of spare tires became our makeshift jack stands.  In no time the wheel was off and the carnage exposed.  Those with weak stomachs may not want to watch.broken cv birfield

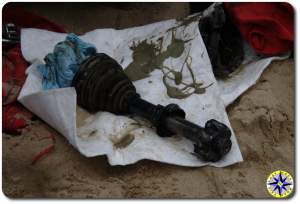
Surprisingly the axle was still in one piece but the inner cage of the birfeild (CV to non-Toyota guys) was in pieces, changing our axle extraction ideas.  Another life line call to Mark to discuss a new plan for removing a whole axle with what was on-hand.

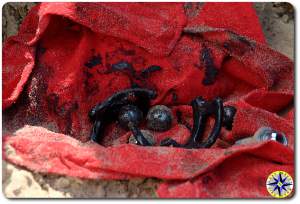
After pulling all the metal bits and ball bearings out of the outer CV joint we had a good view of what was still in tack and we could move the axle back and forth giving us some room to play.  The field service was going to involve removing the bolts on the lower control arm that attaches it to the wheel housing so we could swing it out of the way and slide the axle, tri-ball and birfield star out, leaving the housings on both end cups still attached to the rig.broken half shaft removed

Now just to bolt everything left back into place, throw the wheel back on and jack the rig back down off the spare wheels and the rig was good to go.  2 hours (or so) start to finish and the rig was 2WD now but driving under its own power, steering and stopping just as it should.  Everyone drove the 20 miles back to camp under their own power.

front axle field repairWhile no one wants to see this happen, wheeling anywhere off-road comes with risks and everyone in the group now knows the value of carrying spare parts along with the needed tools to make field repairs.

Just maybe Karma is not the bitch we thought she was.

And if all this excitement wasn’t enough…  All of us, minus one rig with a missing axle, ran another section of the dunes and beach six hours later in the dark.  This run let everyone show off their lights and I swear the light house guy shed a tear when we turned our roof top off road lights on.  yellow willow budsThe night run also gave us the sand all to ourselves for a mostly uneventful time…  Of course there was a little butt pucker moment when crossing a creek and I found out just how fast my font end can plunge three feet under water and come back up for air.  Then just to rub a little salt in the wound, on that last dune out, it took me way too many times to make it up hill off the beach.  If fact eventually, I had to air way down with the ocean tide lapping at the wheels in order to climb the hill and get back onto the trail.

Would we do it again… You bet…  and in fact…  Tomorrow we will.

florence dunes

Day 0 Night Before The Dunes

Like a kid waiting for Christmas day I’ve been looking forward to the Northwest FJ Cruisers Club’s off-road adventure at the Oregon Dunes just out side of Florence.  To ready the rig, I greased it up, checked all the fluids, torqued the wheels, examined belts and hoses as well as going over all my recovery gear and tools in prep for the run. I packed the rig up for the two day run including camera and video gear.

I checked and double check… And after making it as far as Portland… My wife tells friends, I always forget something and I feel it is important to prover her right. In the morning I will be buying another CB antenna. Apparently you can’t have enough antennas since this will be my third in the collection I’m building… But an antenna seems like a small price to pay for what will surely be fun in the sand.

metal tech beer pint glasses

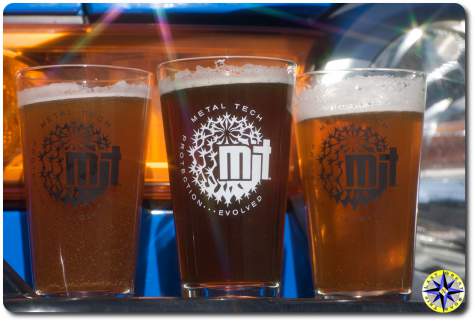
Loose The Shirt – Win The Battle!

It’s funny how friendships develop.  You never really know until it is too late and you’ve gone and made a new friend.  One such friendship was struck up purely by accident.  A couple of years ago when we started to build up the rig for off-road adventures, I went looking for a shop that focused on Toyota trucks with a reputation for quality work and great service.  I found Metal Tech 4×4.

From the start there was something about Mark’s quiet confidence, patience and deep knowledge of all things Toyota Land Cruiser that struck me.  Mark chatted with me for hours about our plans for the rig, explained where he thought we should focus our mods and how to best prepare for the perils  of off-road travel. Mark took the time to explained the pros and cons of different suspensions, how to approach obstacles with an IFS vs. a solid axle, and even where to look for other resources.

At the 2008 FJ Summit Boy and I had a chance to wheel with Mark and LT.  To this day Boy still comments how much fun he had on Day 6 Blue Bunny,  thanks to Mark and LT’s ability to make a 14 year old boy feel like one of the guys.  Since then I’ve had a few chances to swing by the shop and it never fails that we spend a significant amount of time catching up.  Sure we talk about Land Cruisers, wheeling and upcoming activities.  But we also talk about our lives, kids and the zen art of small business management.

Only another entrepreneur can understand what its like to bet on your own business skills and stare down the responsibility of being the accountant, sales guy, bill collector, product developer and head bottle washer.  When I talk business with Mark his passion for creating quality products that allow others to enjoy off-roading as much as he does, really comes out.  But you still have to pay the bills and not too long ago Mark told me his story: “Loose The Shirt – Win The Battle”.

Intuit, the guys who brought you Quicken software, are running a competition for users of their business software.  The competition involves writing a story about your business and exposing yourself to the public vote for best story.  The top 50 stories will move on to the next phase of the competition with the winners eventually receiving cash grants to build their business.

It is not often that I ask you to take action.  Sure I ask you to click through a Google ad or two, but that is nothing compared to this request.  This is important.  Please take a moment:

  • Read the story Mark submitted Really go read it!  I’ll wait…
  • Vote on the story as Inspiring, Useful or Funny…  did you vote yet?  how about now?  NOW?
  • Leave a comment letting Mark and LT know what you think about their story

You will need to register with Intuit in order to vote.  It only takes a minute and you’re not having to give up any family secretes. No emails, no waiting just sign up, vote and done…  It’s that easy and a minor price to pay for the opportunity to make a big deposit in your good wheeling Karma account.  Remember…  Vote Early…  and Vote Often!

Thank you for helping a friend  out and the next time you find yourself in Newberg, OR. say hi to my friends at Metal Tech.  You just may strike up a friendship of your own.

map and compass

Finding Your Way

You may have noticed a new tab up top that links to our off-road adventure map page. Maps are invaluable on the trail and in planning your off-road trip. How do you get to the trail head.  Where are the closest roads if you have to hike out or if medical attention is required and you need to cut your adventure short? Where are good camping locations when your covering multiple days? Where are your water or fuel stops? Where does that trail spur reconnect with the main trail…  Where the hell am I?

Don’t under estimate the value of a good map. Good maps are important and can save your life.

There are truck loads of free resources out there but don’t forget you get what you pay for. In planning our off-road adventures we use lots of  resources including road Atlas and Gazetteers as well as BLM, Green trails and National Geographic TOPO maps.

If nothing else, maps let you dream about and plan your next off-road adventure on those late nights when you’re stuck at work.

Go to our Map Page for down loadable maps we’ve found handy in planning some our off-road adventures.