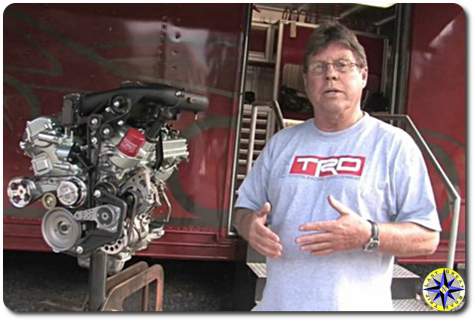
Not long ago on an off-road adventure we had an opportunity to meet and talk with some of the folks behind Toyota Racing Development’s (TRD) products for the FJ Cruiser and Tundra trucks. TRD is Toyota’s team responsible for taking what they have learned from racing and turning it into products for the consumers who want more than basic grocery getter transportation. The TRD super charger is just one of the many products that the team has brought to market.
Category Archives: 4×4 Tech
How to fix, maintain or modify your off road adventure truck is here. We also discuss gear and how it holds up out on an adventure.
Wheeling With Responsibility
We have a great time on our off-road adventures and enjoy spending time in the great outdoors. With these activities comes responsibility. The responsibility of maintaining a healthy environment for everyone to enjoy. That means packing it out, leaving no trace and treading lightly.
Tread Lightly!, Inc. is a national nonprofit organization with a mission to proactively protect recreation access and opportunities in the outdoors through education and stewardship initiatives.
Tread Lightly! Awareness is a great place to start if you are looking to learn about taking care of the places we call special or to teach others the benefits of wheeling responsibly. This online course really delivers a solid educational experience. It is free and you can complete it in your PJs… TMI?
When you are ready to take the next step, sign up for a Tread Trainer course where you will learn outdoor ethics focusing on motorized, mechanized or water recreation. The trainer program is an instructor lead course where students are given a crash course in outdoor ethics and taught to deliver tread lightly presentations to local schools, clubs and organizations.
Treat Lightly! puts out a great Newsletter so you can keep up on their events and stay on top of using our trails and water systems responsibly.
There are few things more rewarding than giving back to whatever it is that makes you smile. Participating in Tread Lightly! is on opportunity for anyone who enjoys wheeling in the great outdoors. Take a few moments to gain perspective on our environment and spend time at a site where rig, cycle and water craft owners come together to protect and ensure the national inheritance of our children.
Scuba Steve Drives an FJ
…the water was exceptionally wet with the rain, heavy snow melt and oceans rising from the global warming. As the water in the rivers crested and levies broke, flood waters rushed over everything west of the Pacos. The only hope for saving the orphans was Scuba Steve riding high in his FJ Cruiser. Crossing the high water in his Voodoo Blue wet suit, Scuba Steve saved the children and Sister Mary Knuckle Buster, driving them to higher and dryer ground… it could happen!
But before it did, we would want to relocate the rear differential and E-Locker’s breather to a higher and hopefully drying location. You can read the horror stories on the forums about rigs who got water sucked in through the breather and the dollars it took to pull the fish out of their rear end. You can also read how simple it is to relocate you breather, with the list of parts and instructions.
After running a number of wet off-road adventures this winter and pushing my H2O luck with some crossings, I finally took the plunge and performed the famous Scuba Mod on the Last Great Road Trip’s Rig. As the video shows, it was a simple process of pulling a length of hose down from the gas fill area to the rear frame, zip tie it here and there, pull the stock breathers, hook it all together with a handy little T-connector and put the original breather on the hose end back in the gas fill where is all began. Waalaa Scuba Mod.
While we may not be called in, like Scuba Steve, to save a house full of orphans or the Hooters bikini car wash girls, we can feel confident in navigating some water crossings that previously had us a bit nervous.
Not Your Mother’s Headlights
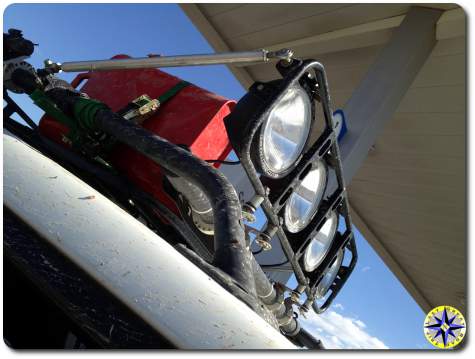
When we started planning for the Baja off road adventure we know we would need some serious lighting if we were going to explore the desert at night. Not wanting to take any chances we looked at a lot of manufactures’ lighting systems. After months of painstaking analysis and research, reading through magazines (looking at pictures), going through forums, stopping at 4×4 shops and talking to anyone who would listen, we decided to go with Baja Designs’ Soltek setup.
We choose these lights for their crystal clear optics, high quality electronic components, no-tool adjustments and a mounting system that isolates vibration. They also weep testosterone on the pages of Hula Betty’s magazine.
Need more information… How about our PDF write-up over on ISSUU on installing off-road lights to go along with the video.
Even more information… Must read, step by step Toyota Bulletins:
- Toyota FJ Cruiser auxiliary lights install
- Toyota FJ Cruiser roof top air dam light bar install
- Gobi FJ Cruiser roof rack off road light installation instructions
- 2007 Toyota FJ Cruiser electrical wiring diagram
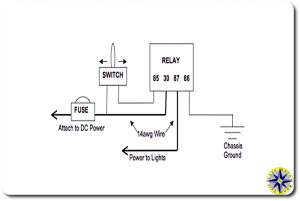
Another little tidbit that is handy to refer to is a relay diagram when you’re trying to remember all the different wires going from here to there. This is a nice reference:
If you still need MORE… drop us a comment with your question and let us know if you like the format and what we can add to help others when it comes to off road light selection and installation.
Keeping the Vision Clear
Everyone asks… How do you like the rig… How did it perform on your arctic circle adventure?
Our answer… IT IS Great. The only thing we would fix… The windshield! The windshield picked up a number of star cracks which in the cold weather this winter turned to crack across the length of the windshield. And we finally decided to fix it.
Read the posts on the FJ Cruiser forums about windshields, lower right side, I’ll wait.
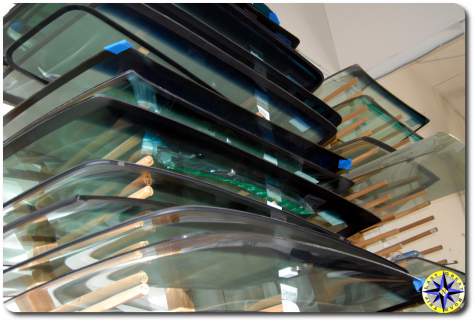
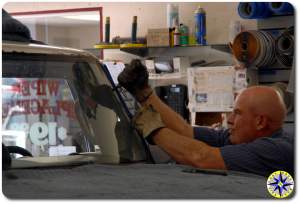
What you find is that you should buy stock in glass, your going to replace a few. This is our frst windshield replacement so we took it down to the local glass guys at The Autoglass Clinic to see what it takes.
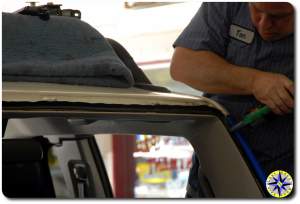
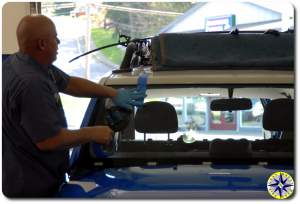
Turns out, the easy part is putting the windshield in. The hard part is getting all the little bits of molding and covers pulled without leaving a mark. Once the bits are off, pulling the old glass and replacing it with the new windshield is quick and easy.
When it was all said and done the guys made it look easy and did a great job. They even offer a slice of pizza for being the first FJ these guys changed out. Another bonus that came for hanging around with these guys was understanding what comes apart and how. This new found knowledge will be come in handy as we take on installing the Soltek 8″ LaPaz HID lights that just arrived from Baja Designs. But that is another story.
Baja Designs Joins in Supporting The Adventure
We are very pleased to have Baja Designs as the newest sponsor of our off-road adventures.
When we went looking for auxiliary off-road lights for the rig, we spent a great deal of time researching the various technologies, available products and the companies behind those products. What we found from painstakingly analyzing our off-road lighting needs and asking for input from a number of experts is that Baja Designs has been developing top quality high-end aftermarket lighting systems for the off-road race industry for 14 years. Baja Designs also offers a 3 year warranty on their Soltek Fuego 4″ and LaPaz 8″ lights. These guys stand behind their products. Legendary quality lights, warranty protection, crystal clear optics, one-of-a-kind tool free aiming system and guys that know the Baja like the back of their hand, oh yeah these lights are for us.
When we contacted Chris Chapman at Baja Designs, asking for assistance and sponsorship support we were ecstatic to hear that they would help us out. These are the same guys who are the official sponsors for the American Honda’s off-road team; we are in good company.
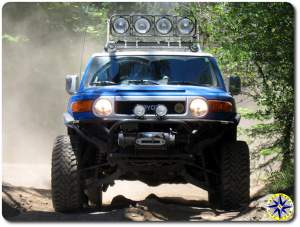
Over the coming weeks look for how to install off-road lights as we discuss the lighting basics and mount our two Fuego 4″ HID Lights on our Rig’s bull bar and four 8″ Soltek HID Lights on the roof.
How Do You Get to Carnegie Hall…
Everyone knows the old joke… A tourist pulls up to a man on the corner and asks: “How do you get to Carnegie Hall?” The man on the corner says “Practice… practice… practice”
That is good advise and especially important when you are stuck on the trail. This is not the time to unwrap your shinny equipment for the first time and try to figure out how to use it. More than likely when you get stuck it will be dark, rainy and muddy or sandy, glaringly hot and windy (isn’t that what you went out to find). Stuck in these conditions is exactly what recovery equipment was designed for and when used correctly, will make easy work of a tough situation.
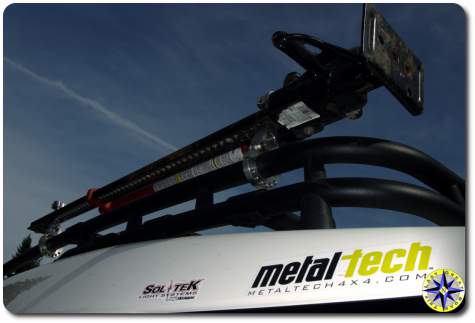
One of the most versatile and low cost pieces of off-road adventure recovery equipment is the hi-lift jack by the Bloomfield Manufacturing Company. The hi-lift jack can be used to lift or pull a rig out of the mud. It can be used to break a tire bead or push a panel into place. The hi-lift jack can even be used to change a tire. However, it can also put the rig into an unstable and unsafe position if the directions and safety instructions are not followed.
If you understand and practice how to use the hi-lift jack properly it can be one of the best pieces of recovery equipment you have with you on the trail.
Landing at Your Launching Point
So you’ve got your great adventure driving through Chile all planned out. You’ve tuned up your rig, dug up all your gear, and mapped out your route. Now you’ve just got one minor problem: that big red dot marked “START” on your map is at the foot of the Andes, while your rig is getting the neighbor kid’s basketball bounced off of it in your driveway in Hoboken. Getting your vehicle to your launch point can be a challenging task, but given the proper time, preparation, and precaution, this process doesn’t have to be such an adventure.
Before you even start to look at how you are going to get your rig to that big red dot, you should make sure that doing so is actually feasible. Every country is going to have its own vehicle standards and import regulations. A good starting point when researching these issues is the State Department’s list of Web Sites of Foreign Embassies in the U.S. These usually have links to the relevant regulatory entities in each country. Make sure that your vehicle will be street legal and that you will have the resources and parts to make repairs.
By Land
So now you’ve done a little homework, and it is time to figure our how you are actually going to get your trusty rig to the origin. Your adventurous instinct might tempt you to just pick up and drive all the way to Chile, but chances are that time, money, and your spouse may push you to look for other options. Travel can get expensive, and every border you cross could present you with any number of surprises. If you get delayed, you might not make it in time to complete your Chilean quest.
If you aren’t going to move your vehicle from behind the wheel, you are probably going to be looking at paying someone to do it for you with some combination of land and sea transport. This is where advance planning is going to be critical. The more flexible you can be with your time-frame, the more affordable shipping should be. If you are lucky enough to live on the coast, you should be able to save some time and money by getting your rig to the docks yourself. Otherwise, you are looking at some domestic shipping, which in itself could require about a month of advance planning. Some international shippers will be able to cover this domestic leg of the trip as well, and this consolidation of services can simplify the process considerably.
By Sea
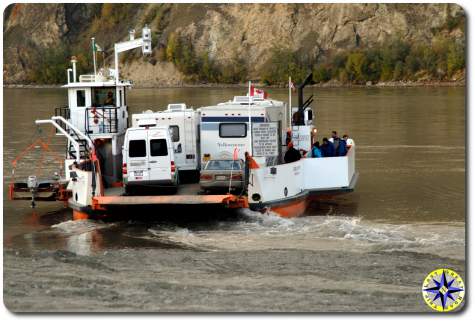
Your vehicle will likely spend the maritime portion of its voyage in an enormous box shipping container with other vehicles. If you are extremely protective of your rig, you may want to shell out some extra cash for a private container. One other high-end option is a cruise ferry. This is essentially a combination of a roll-on/roll-off (RORO) freight ship and a luxury cruise liner. In addition to a steep price, this option also may leave you with little flexibility regarding timing and destinations. As an advantage, however, this option also moves something else you will need on your trip: you! If you can swing the cash, you’ll be able to ride in style.
There are any number of companies that provide international auto transport. When choosing a shipping carrier, make sure to do some research to ensure that they are a reputable company with the necessary registrations and licenses. Find out what parts of the customs process they can handle for you. Shipping brokerages and auction sites can be useful in finding the right shipper for your needs.
You can save yourself a lot of hassle by starting your trek from your incoming foreign port. If your origin is landlocked, however, you may need to secure shipping within a foreign country. The difficulty of this task depends a lot upon the level of development in that country and your comfort with the foreign language. In more developed areas, you may be able to arrange something online, but in a developing nation, you might have to make some arrangements in person.
By Any Means Necessary
If all this sounds a bit too daunting, don’t be afraid to get creative. Does it make more financial or logistical sense to purchase a new or used vehicle at the origin? Maybe you can find a fellow adventurer that already has a vehicle on location. Perhaps you could trek together or use the vehicle when they are done and split the cost of shipping. Find some adventure forums and see what other travelers have done.
Don’t let getting there be the whole battle. Plan ahead and work within your means. You’ll be chugging along towards that “FINISH” dot before you know it.
Written by Adam Greenspan of uShip, an auction-style marketplace for Auto Transport.
The Rig That Gets Under The Skin
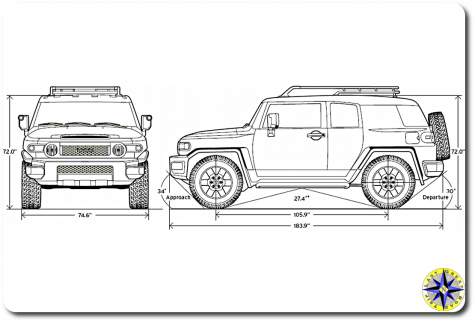
Today was a good day! Planning for an off road adventure takes a lot of work… no matter what my wife, Hula Betty, says about my playing around on the Internet. One of the areas to plan for is rig maintenance, modifications and inevitable breakage. A big part of this effort is having the original manufactures specifications for electrical and mechanical components. And out of shear dumb luck I came across these great resources:
- 2007 Toyota FJ Cruiser repair manual
- 2007 Toyota FJ Cruiser electrical wiring diagram
- Toyota FJ Cruiser roof rack installation
- Gobi FJ Cruiser roof rack off road light installation instructions
- Toyota FJ Cruiser auxiliary lights installation
- 2007 Toyota FJ Cruiser supercharger fit kit bulletin
- All 02-07 Toyota vehicle pulling to one side
- Toyota 2007 FJ Cruiser initial compass calibration
- Toyota FJ Cruiser SRS airbag system
- Toyota FJ Cruiser parking assist system
- Toyota bulletin vehicle stability control system description
- Toyota bulletin vehicle stability control system
- Toyota bulletin A-trac light remains on
- Toyota bulletin A-trac light does not come on
- 2007 FJ Cruiser owners manual
- 2007 FJ Cruiser Maintenance Schedule
With these manuals, we should be able to better plan for some of our upcoming mods including auxiliary lights and a low gear transfer case.
Than there is the just plain cool stuff. How do you sell a new car model? You put out a retro coffee table book, FJ Magazine, and send it to dealers along with a FJ Cruiser new car features that provides a technical explanation of the construction and operation of new mechanism and technologies used in the new FJ Cruiser. And finally include a 2007 Toyota FJ Cruiser specification sheet and FJ Cruiser product reference guide which shows off the best features of the vehicle against the competition. And Wala! You have product launch.
I’ve never had a rig that got under my skin like this one. Maybe it is the history, the vehicle quality or the rugged go anywhere ability… but this rig is still cool and one of the reason we started our off road adventures.
Project Managers Make Lists
Everyone who backpacks in the wilderness knows about the ten essentials you should always carry. Every backpacker I know also has their own formula for those ten items that minimizes weight and meets the requirement. When your adventure is expecting to see temperatures from 20 to 90 degrees Fahrenheit and is looking at long stretches where no one else frequents, you have to be strategic in what you bring. That is especially true since we are not pulling a trailer and not looking to over load the rig with the kitchen sink while still trying to remain self-sufficient for most situations.
We are getting closer to the list of our ten… ok 142… essentials. While I’m sure the list will change… still seems a little long for a guy who backpacks on a minimalist mantra. As the project manager in me comes out… we make punch down lists to check off. The punch down currently reads:
Emergency stuff:
- assorted tie downs and bungees
- rolls of 100 mile an hour tape (duct tape)
- Hand held Flashlight, a car spot light and a few head lamps along with extra batteries
- Wool army surplus blankets
- A utility tarp
- First aid kit
- Set of flares, safety vest
- Tool kit, wires, zip ties, work gloves ….
- Fire starter
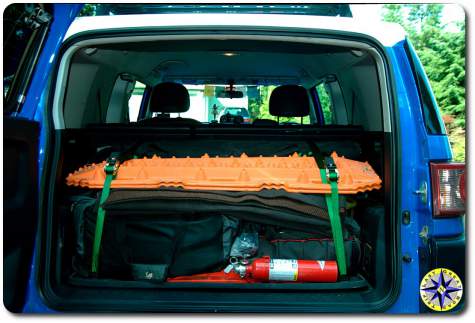
- Fire extinguisher (the irony is not lost on me)
- Extra food
- 6 gallon can of H2O
- MSR stove w/ fuel
- Water purifier
- Maps and compass
Rig Stuff:
- ARB Bull bar
- Toyo Open Contry M/T 295/70/17 tires: Two spare full size tires
- RaceRunner Sway-A-Way Coil Over and rear shocks w/ Springs
- IPA fog lights
- K&N High-flow filter and Airchanger
- Wilderness FJ Cruiser Adventure Rack
- Head Light Armor
- Cobra 75 WXST CB Radio w/ Firestik antenna
- Warn 9.5 XP winch w/ synthetic winch line
- Three 5 gallon jerry cans of fuel
- Hi-lift jack
- Shovel
- Couple of tree straps 10′ and 25′
- Two snatch blocks and D-ring shackles
- 50′ synthetic winch extension cable w/ hooks
- Tire chains
- Wheel chucks and jack stand
Personal Stuff:
- toiletry usuals: toothbrush, soap, toilet paper, meds, lots of deoderant…
- Waterproof Gortex shell
- Pile pull over and vest
- Cargo shorts
- Levis jeans
- Hiking socks & underwear
- Tee shirts (last great road trip T of course)
- Long sleeve shirt
- Boots for hiking
- Shoes for driving
- No-see-um mosquito jacket and pants
- Baseball hat
- Fly fishing gear
- Folding camp chair
- Sunglasses and binoculars
- iPod
- Current copy of 4WD Toyota Owner